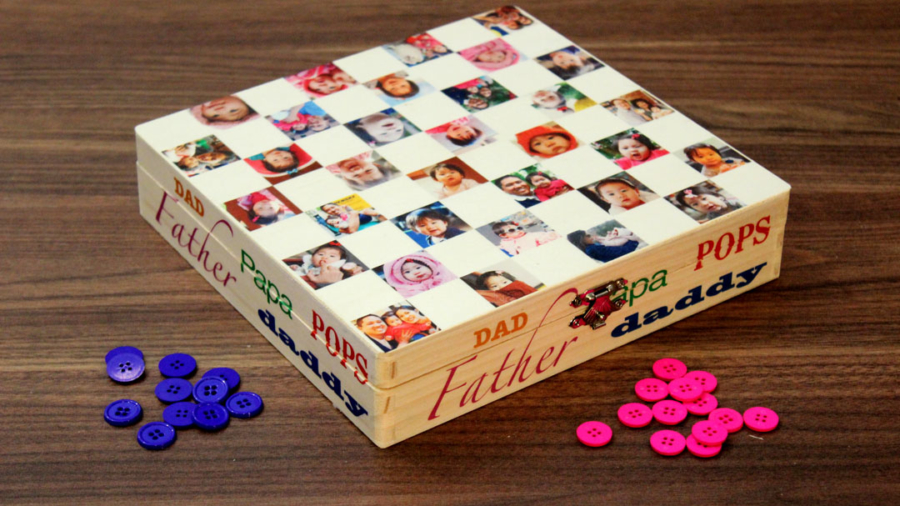
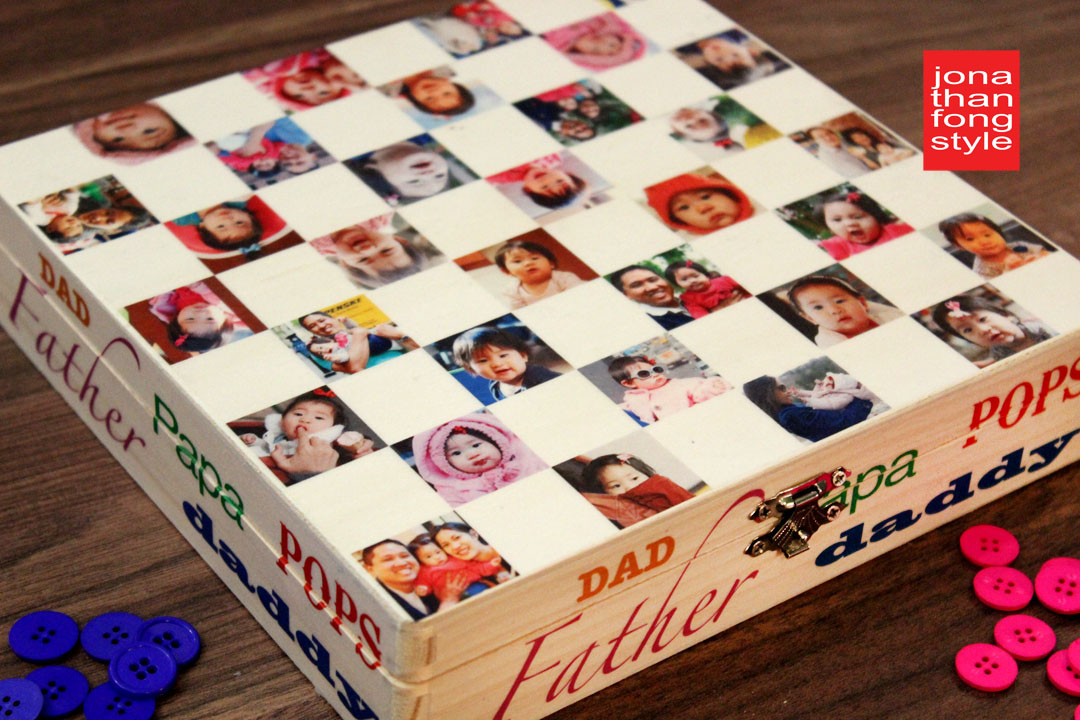
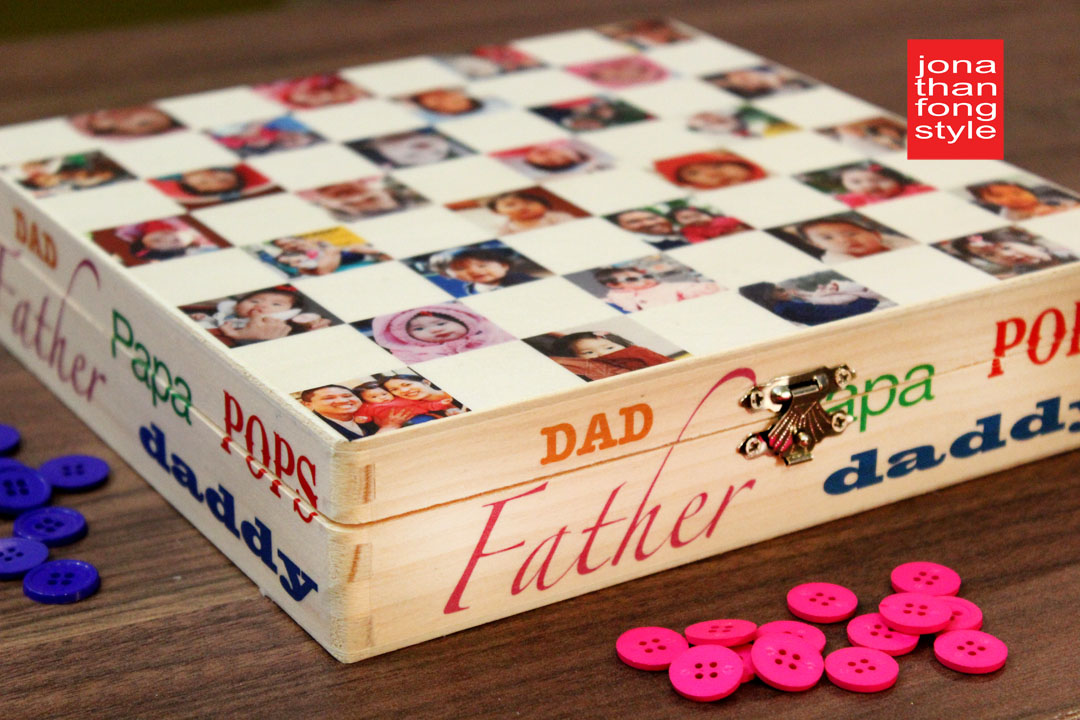
Father’s Day gifts are tough. Really, how many ties can one man receive? And even if pops does play golf, he doesn’t really need another golf-related desk accessory. Well, here’s a fun gift that he’s probably never gotten before: a personalized photo checkerboard keepsake box. On the top are pictures of the family, and the box opens up to store the checker pieces (in this case, buttons). Craft Attitude printable film really makes applying the photos so easy onto the unfinished wood box. The box I’m making here is for my nephew, as this is his first Father’s Day. For those of you who are shocked that I am old enough to have a nephew who has a baby, let me assure you that I am MUCH younger than my brother (my nephew’s dad).
 WHAT YOU’LL NEED:
One hinged wood box, preferably square (The one I bought is an 8″ x 8″ cigar box from woodcrafter.com)
2 sheets of Craft Attitude film (any variety, e.g., Wood Attitude, Scrapbooking Attitude – they will all work for this)
Paper trimmer
Craft knife
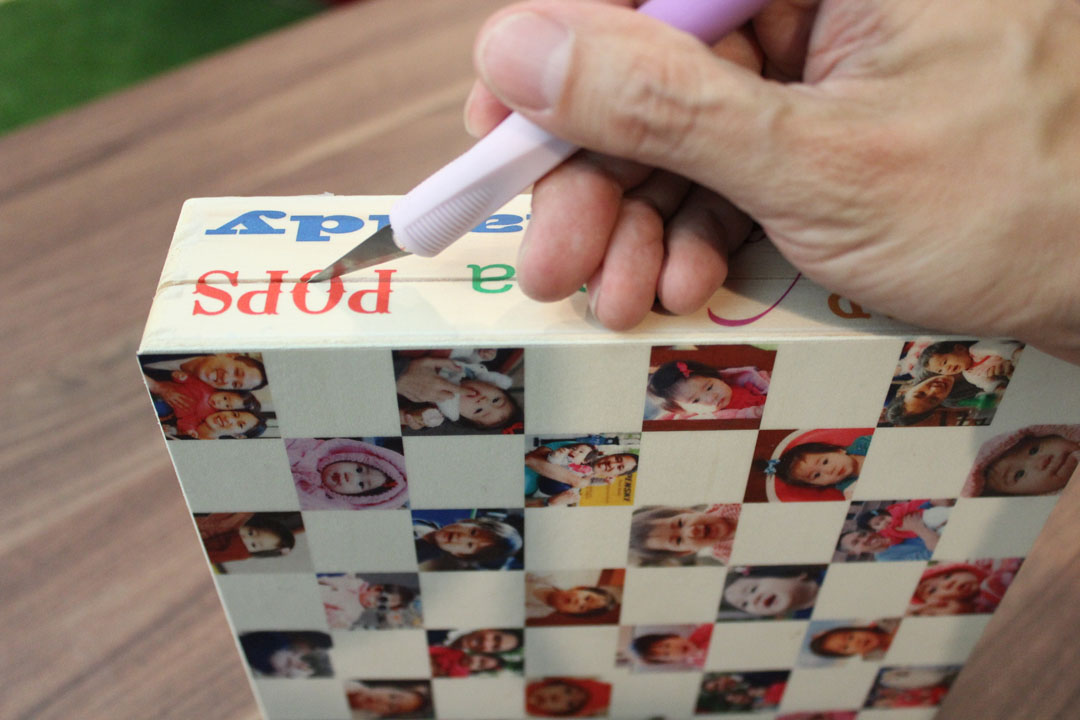
STEP 1: Measure the wood box, and create a checkerboard pattern to the correct size with photos using image software like Photoshop. Just as a reminder, a checkerboard has 64 squares (8×8), so you’ll need 32 photos. Since we’re using photos as the squares, orient them so half are facing one direction, and half are facing the other. I also created another image file of Dad nicknames, like Pops and Daddy, which will decorate the sides of the box.
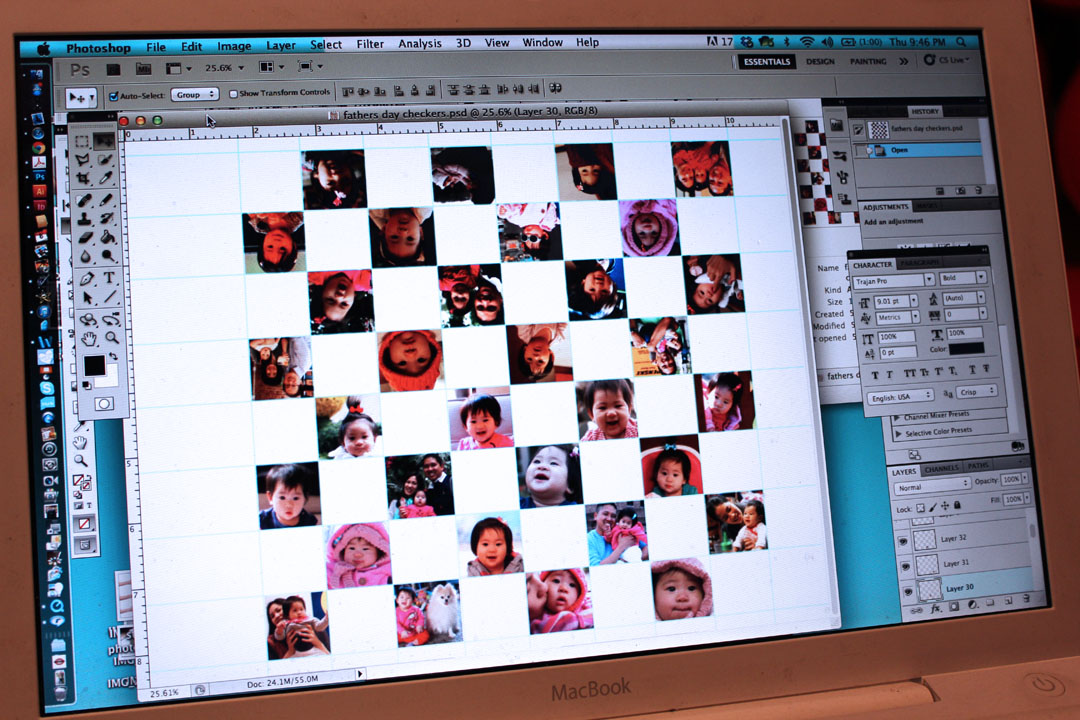
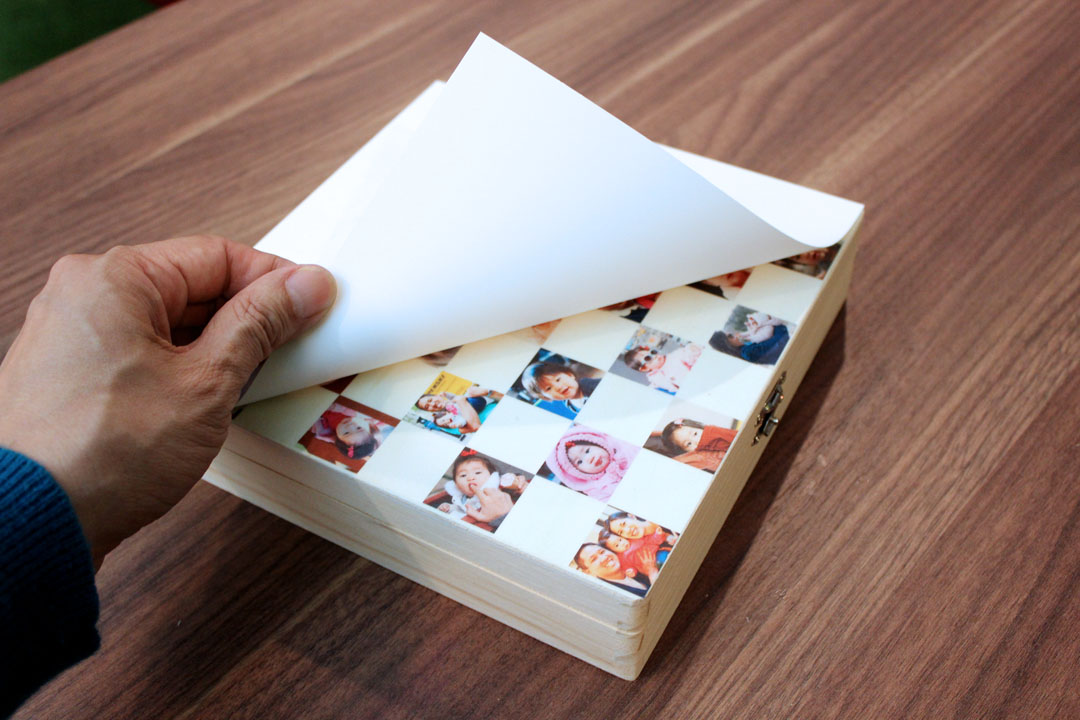
STEP 2: Print out the image files on your inkjet printer. Make sure you print them in reverse because you’ll be flipping the image over, ink side down, onto the wood. Trim the Craft Attitude film to fit the sides of the box. Leave the protective backing on for now.
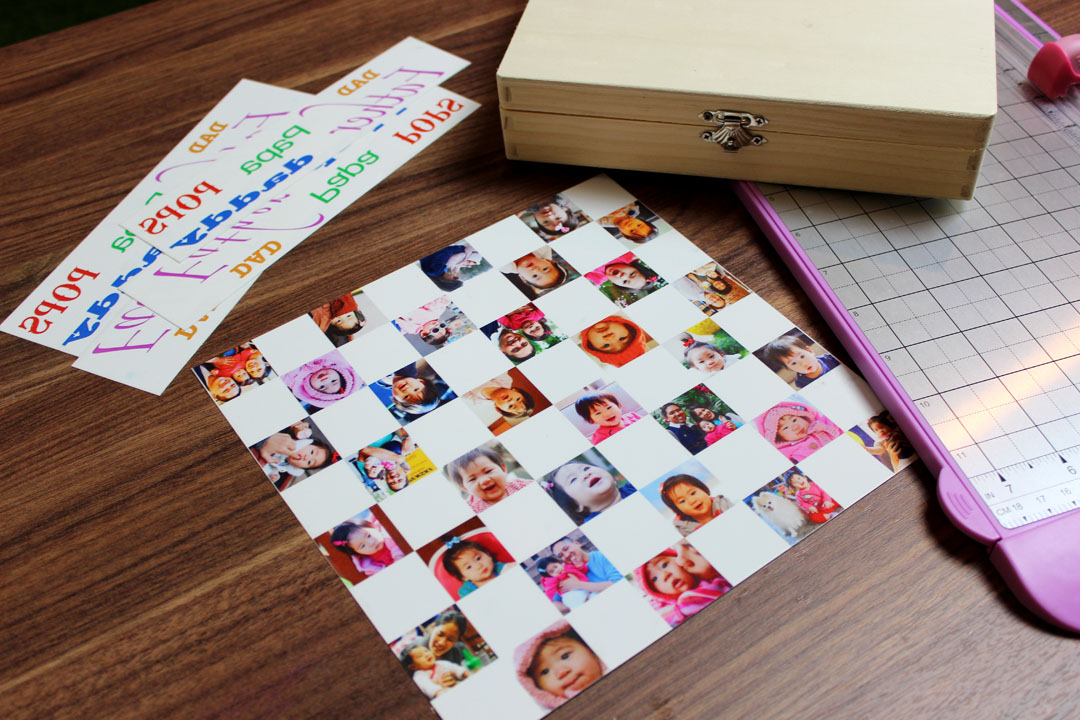
STEP 3: Spray the ink side of the film with Super 77 Spray Adhesive (or another brand like Elmer’s Craft Bond) and position the film on the wood, ink side down. Burnish it with your fingertips and peel off the protective backing, and burnish once more. Look how amazing the images look on the wood. And the unfinished wood now feels so silky smooth.
STEP 4: Apply the film on the sides in the same way. You may be wondering how to deal with the opening on the sides. The easiest thing to do is to apply the whole piece on the side as if the box did not open. Then take a craft knife and cut along the opening. That is much easier than cutting the piece into two sections and trying to align them.
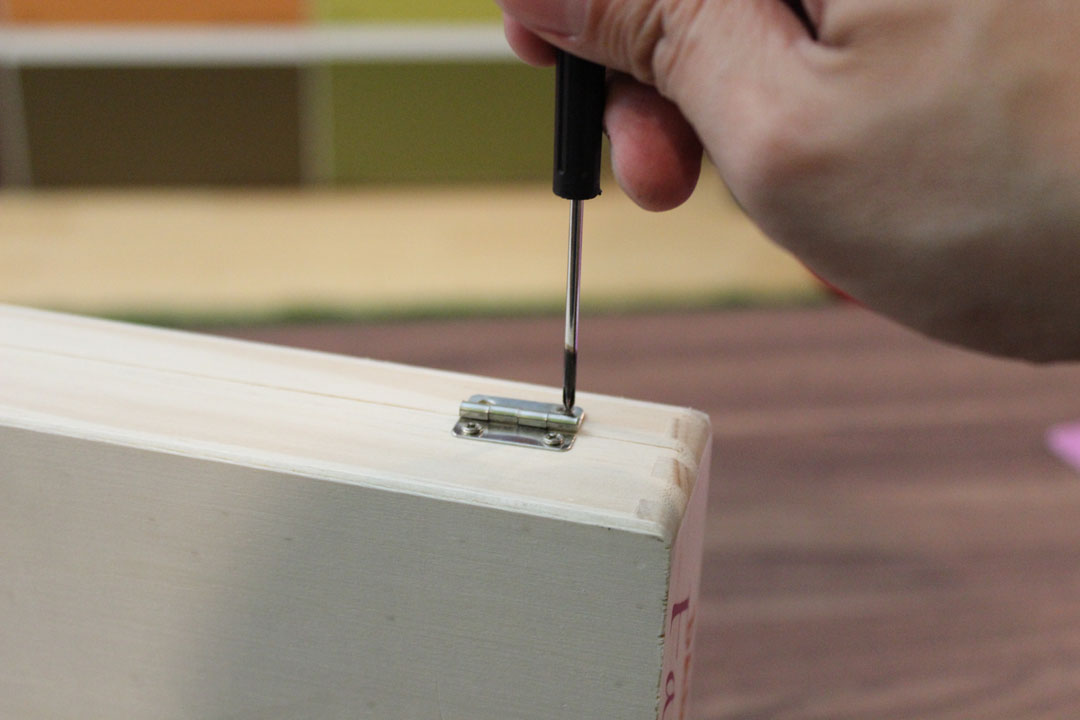
STEP 5: And what about the hardware on the box? I suggest removing the hinges before applying the Craft Attitude and then putting them back on afterwards. That way you don’t have to cut around all the hardware.
What a great gift this would make for any occasion, not just Father’s Day. Be sure to put some checker pieces inside. And maybe since it is a cigar box, add a stash of cigars. Candy ones, of course.
![]()
Add a Comment