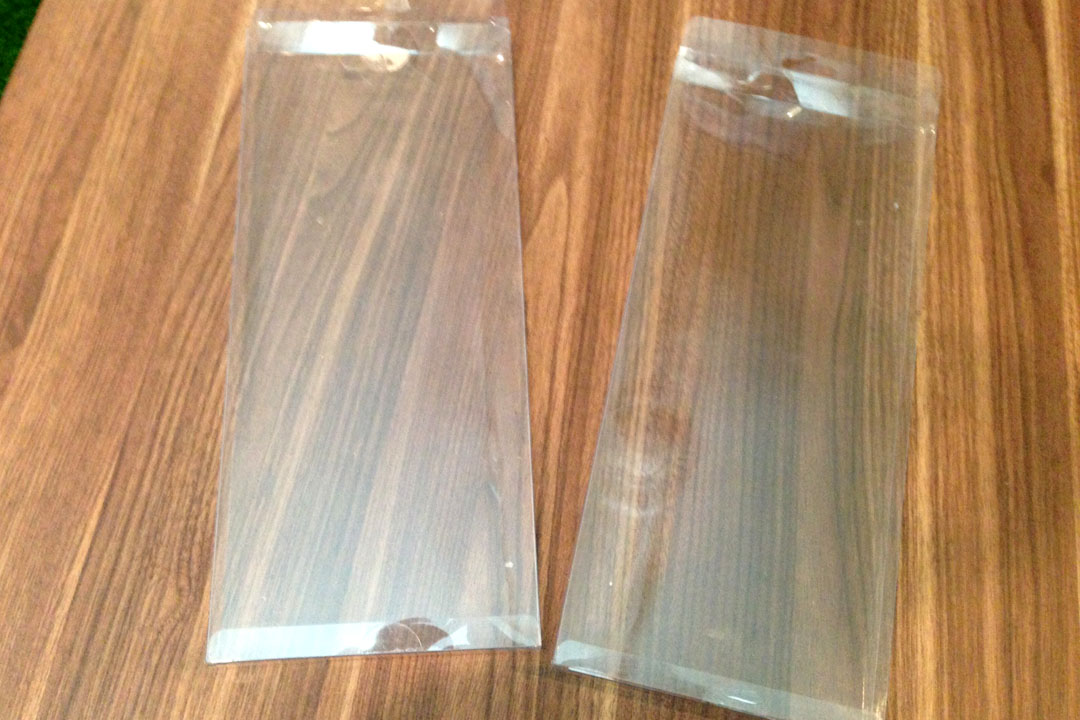
I swear I am not a hoarder. But I just hate to throw away hard plastic packaging and to send it to the landfill. I recently got a shipment of Sizzix dies from Karen Burniston, and I saved all the plastic packaging that housed the dies. Such nice, quality plastic.
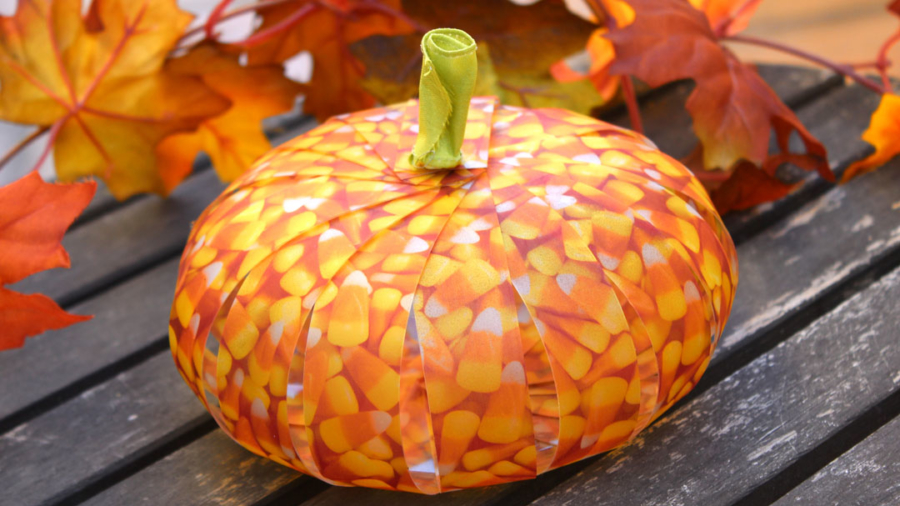
 Since Halloween is coming up, I came upon the idea of turning the plastic into pumpkins, decorating the plain clear plastic with some Craft Attitude printable film. Plastic packaging pumpkins – I had to do it for the alliteration.
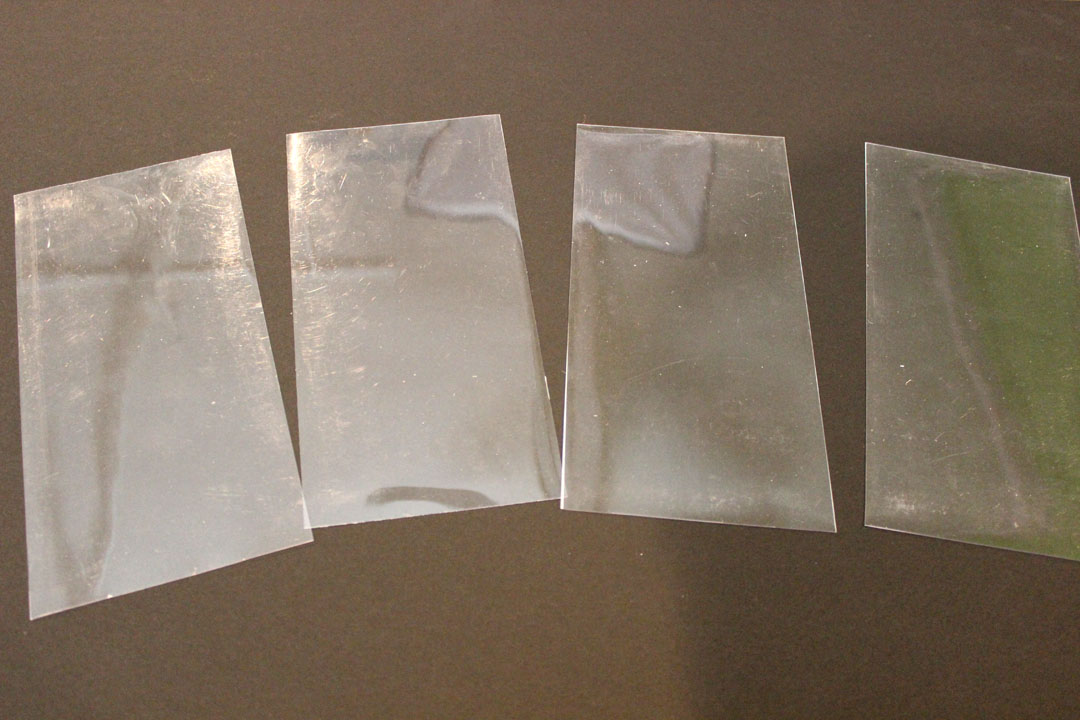
Step 1: I cut apart two plastic packages into four rectangular sheets. These packages were 4″x8″, so I made the four sheets that size.
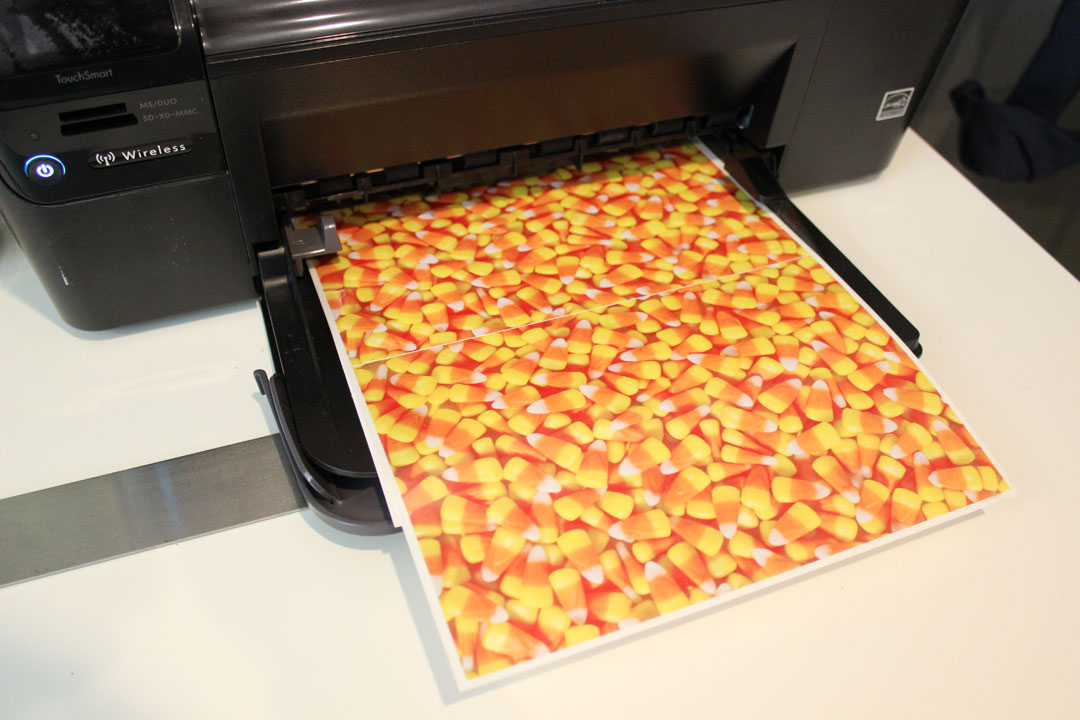
 Step 2: I bought a photo of candy corn from istockphoto.com and printed the image on two sheets of Craft Attitude printable film. I know I use Craft Attitude in a lot of my projects, but it really is a creative problem solver for me, allowing me to add images to practically any surface – in this case, the clear plastic.
 Step 3: Each sheet of the Craft Attitude was big enough for two of the 4″x8″ plastic sheets. I sprayed one side of each plastic sheet with Scotch Super 77 spray adhesive and placed it face down on the ink side of the Craft Attitude. Now, why didn’t I spray some Super 77 on the Craft Attitude and apply it to my surface? Simple. The plastic sheet was smaller than the Craft Attitude, so it was more logical to do it that way.
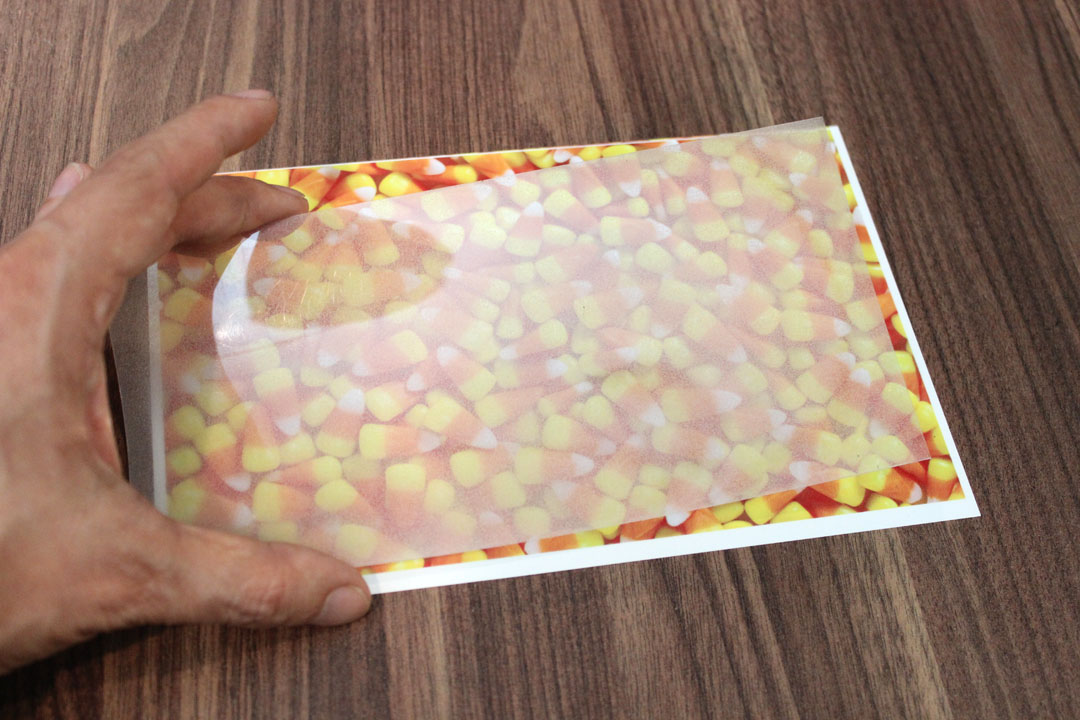 Step 4: Burnish the plastic onto the Craft Attitude film and peel the protective layer from the back of the Craft Attitude.
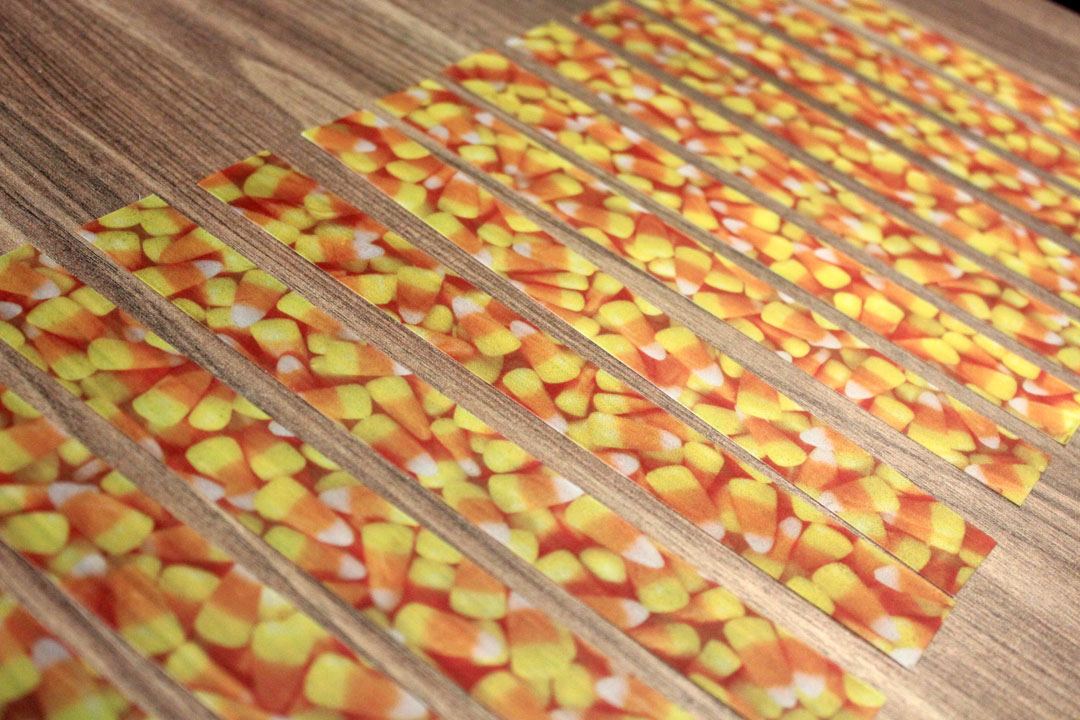
 Step 5: Cut the four plastic sheets into 1″ strips, so you have 16 one-inch strips.
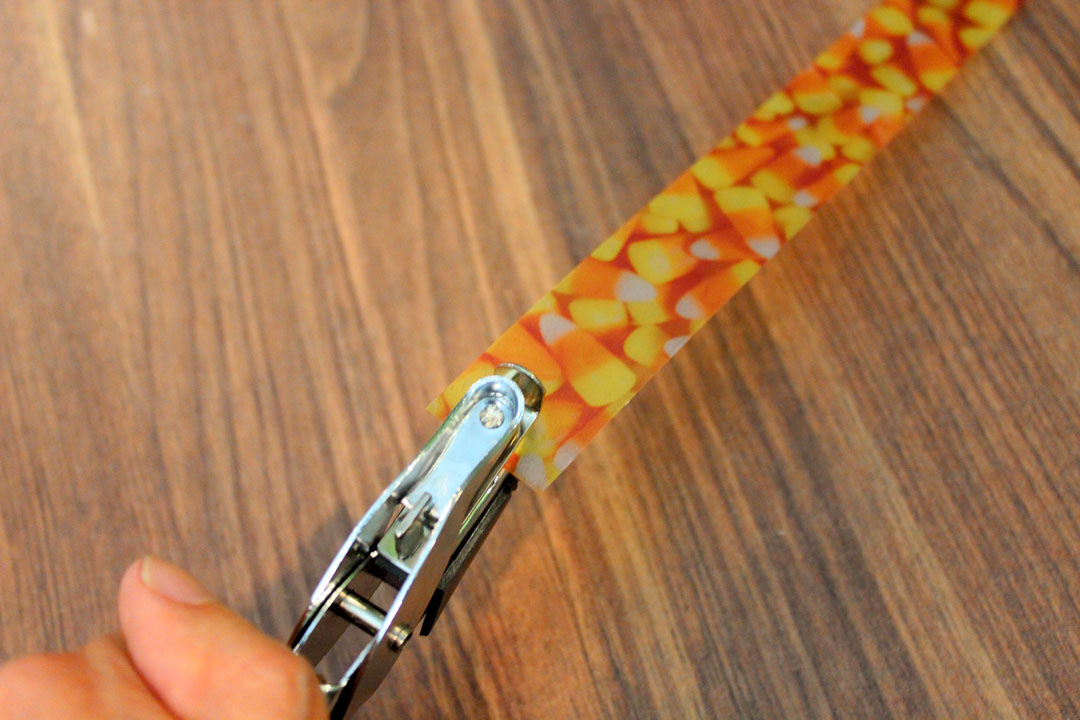
 Step 6: Punch a hole on both ends of each strip.
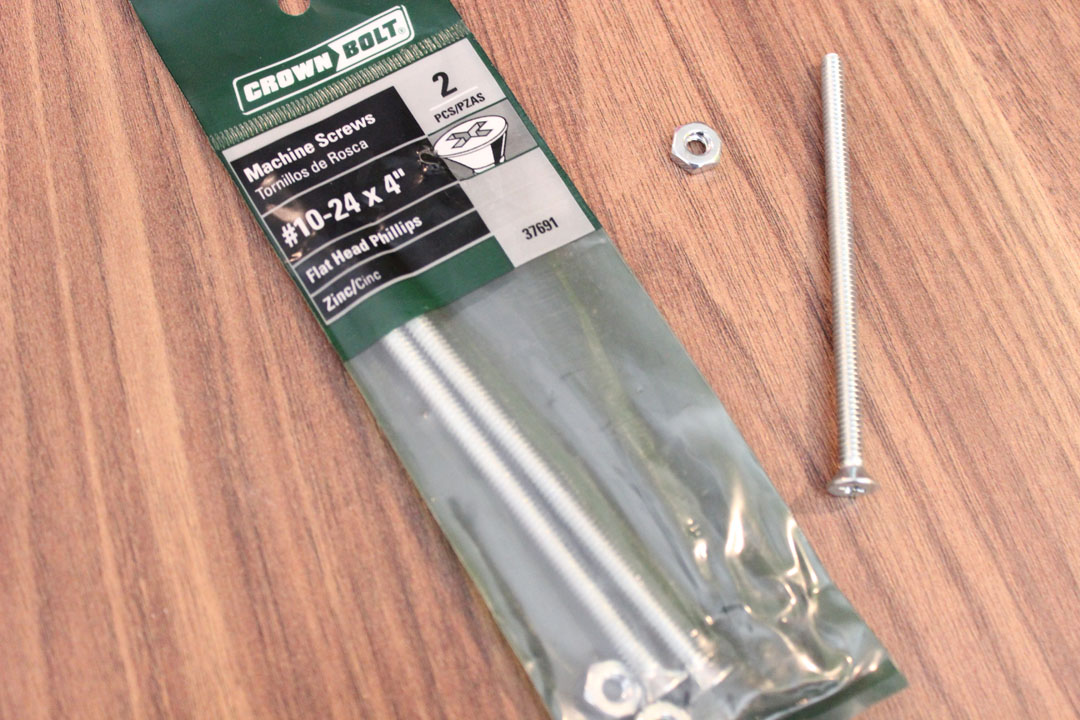
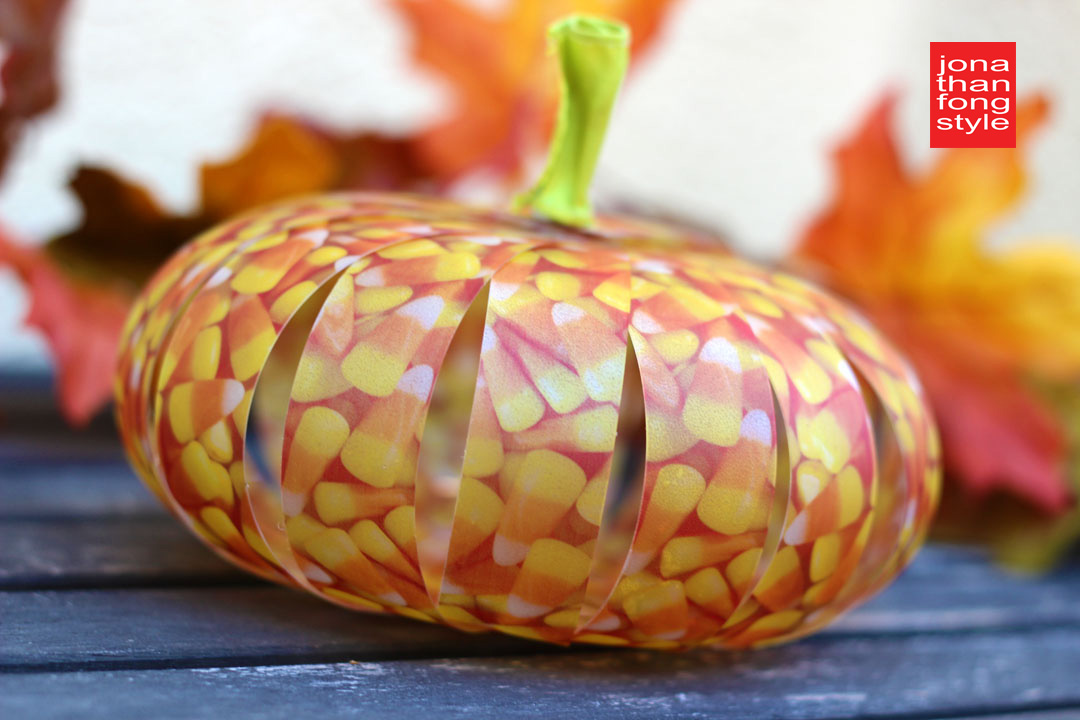
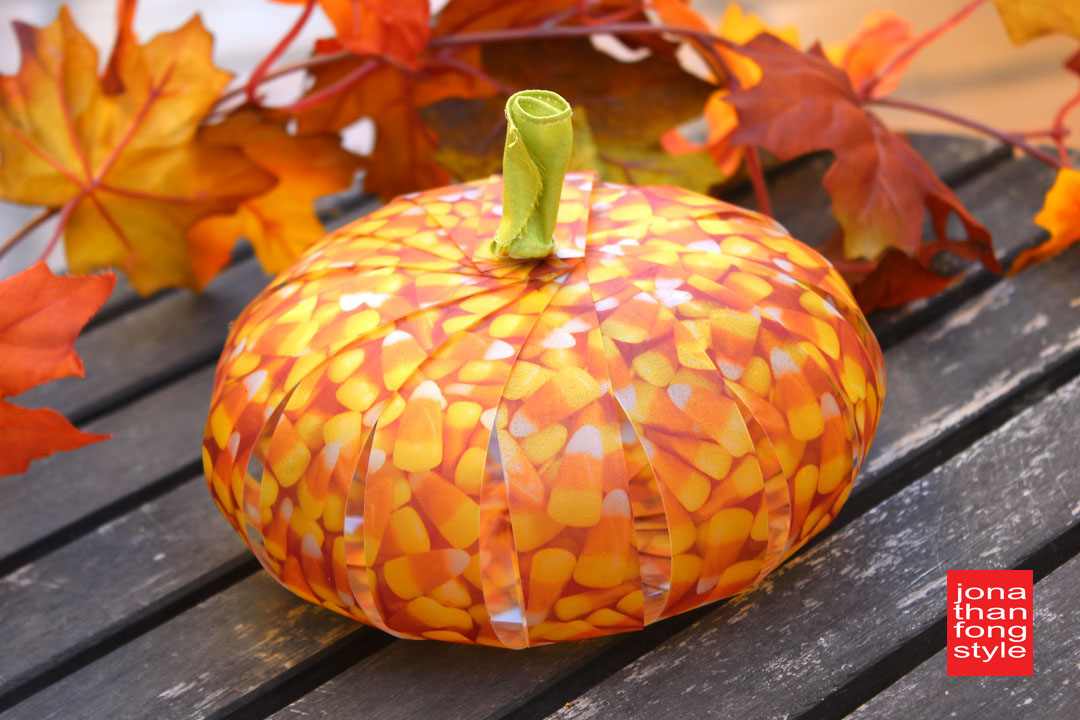
 Step 7: Place the holes of one end of all the strips through a four-inch screw. I bought a combination four-inch screw and bolt set at the hardware, as pictured. It’s up to you whether you want the shiny plastic side or the Craft Attitude side on the inside of the pumpkin. I chose to put the shiny plastic side on the inside, so the Craft Attitude would be on the outside of the pumpkin.
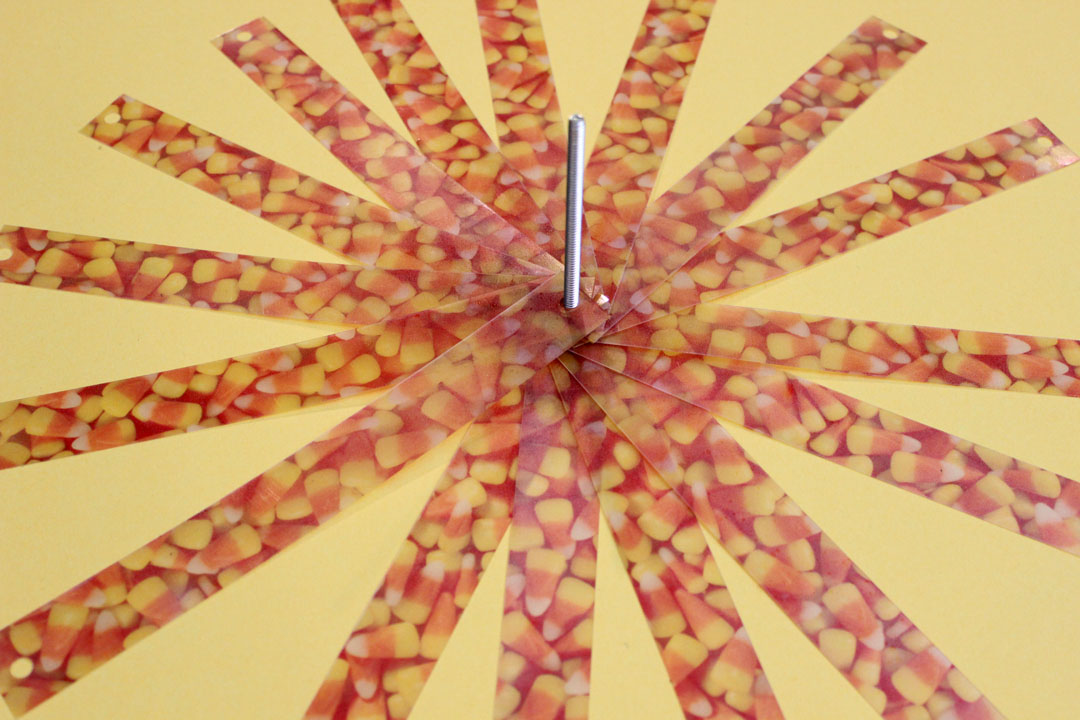
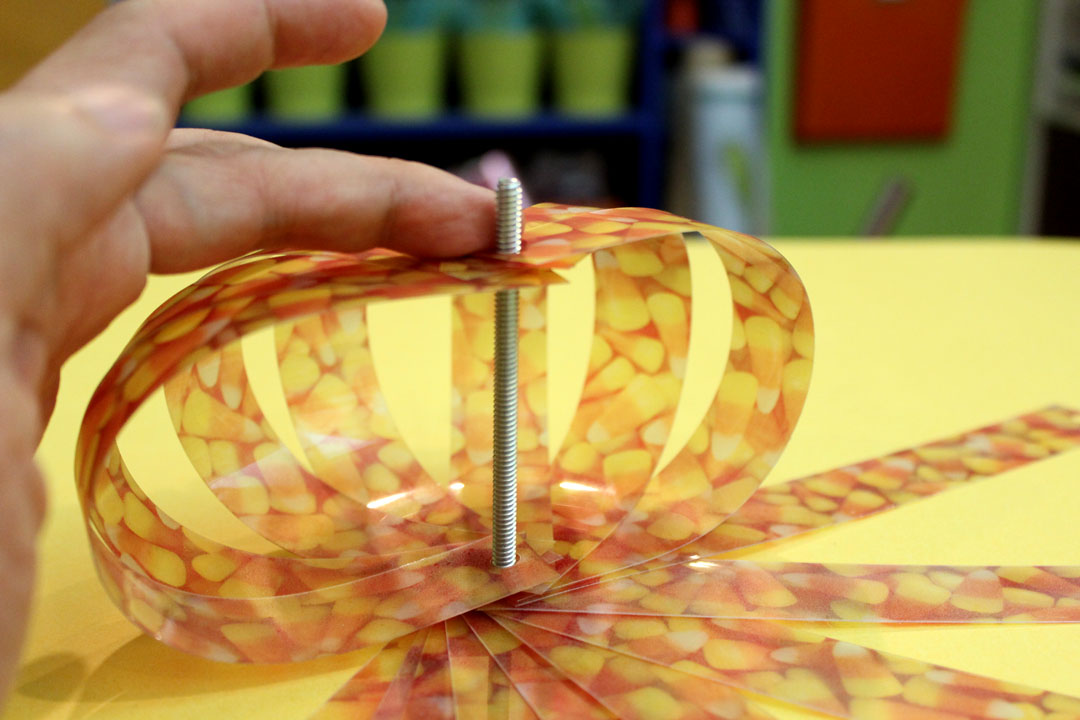
 Step 8: Place the other end of the strips through the the top of the screw. Do this in order around the pumpkin rather than at random so the strips do not get tangled.
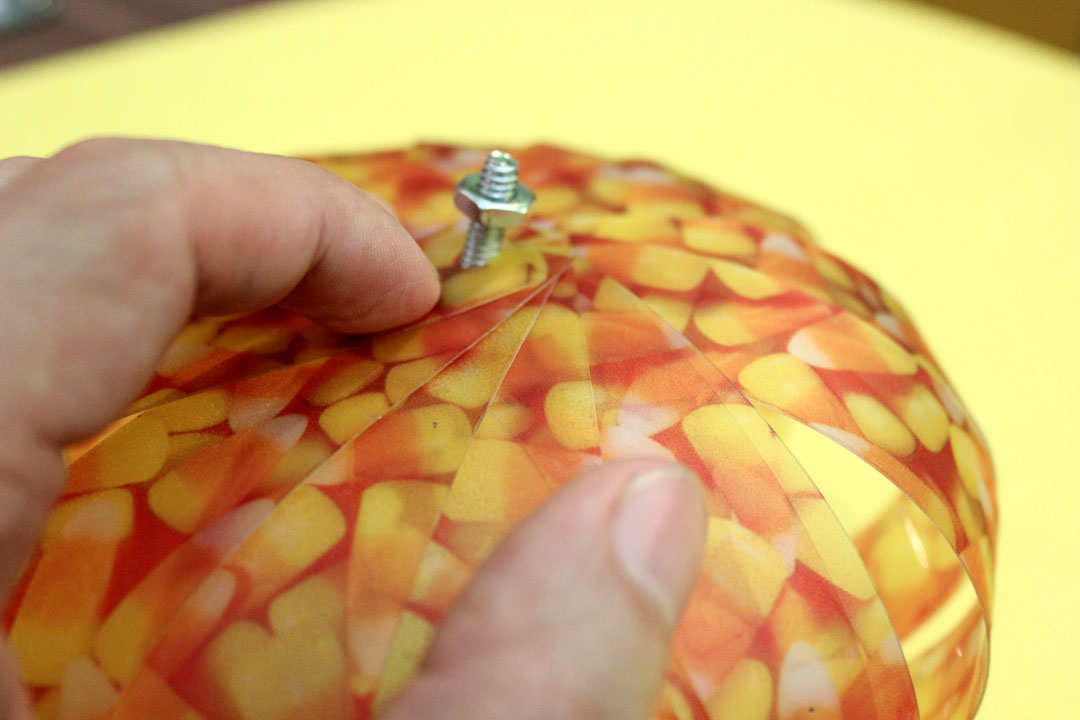
 Step 9: Screw the nut at the top to secure the plastic strips and keep them from coming undone.
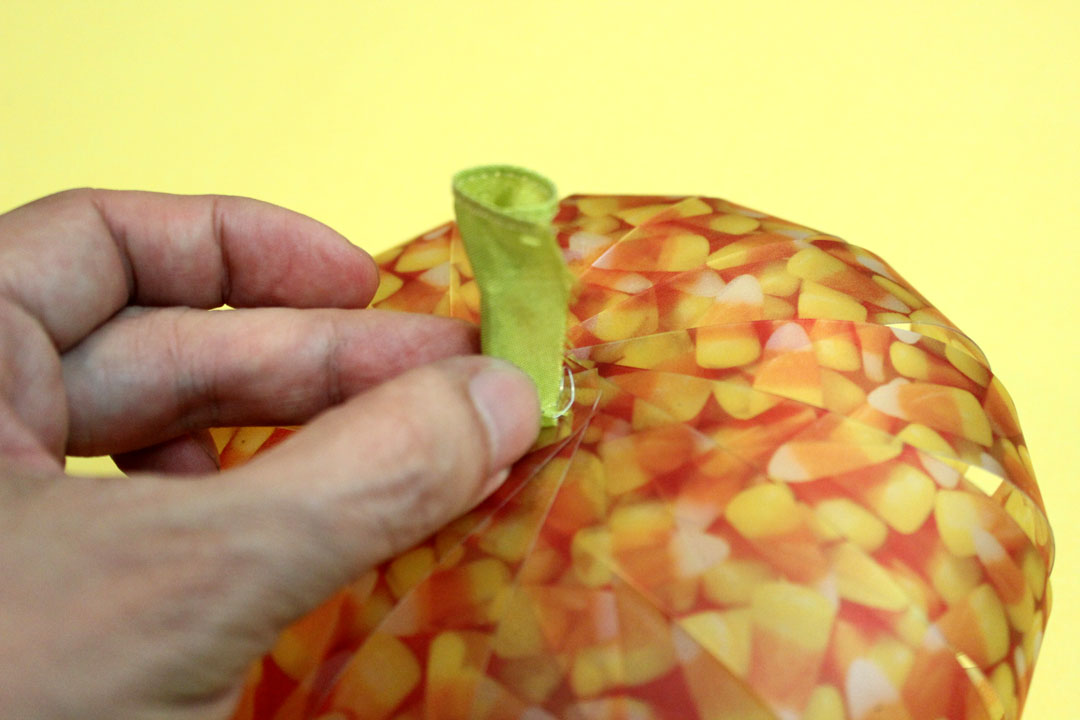
 Step 10: Wrap some ribbon around the screw to hide it and create a stem for the pumpkin. I used double stick tape to secure it. You can also use glue.
If you’d like, you can even push a few of the strips apart and slide an LED votive in the pumpkin to light it from within. I love this pumpkin! Makes me want to upcycle more of my plastic packaging to make more crafts.
Note: I am a designer/spokesperson for Craft Attitude, and the links on this post and elsewhere on this site are affiliate links.
![]()
Great idea and is very inexpensive to do, I like it a lot.
Really like the pumpkin
Thanks Liz!