
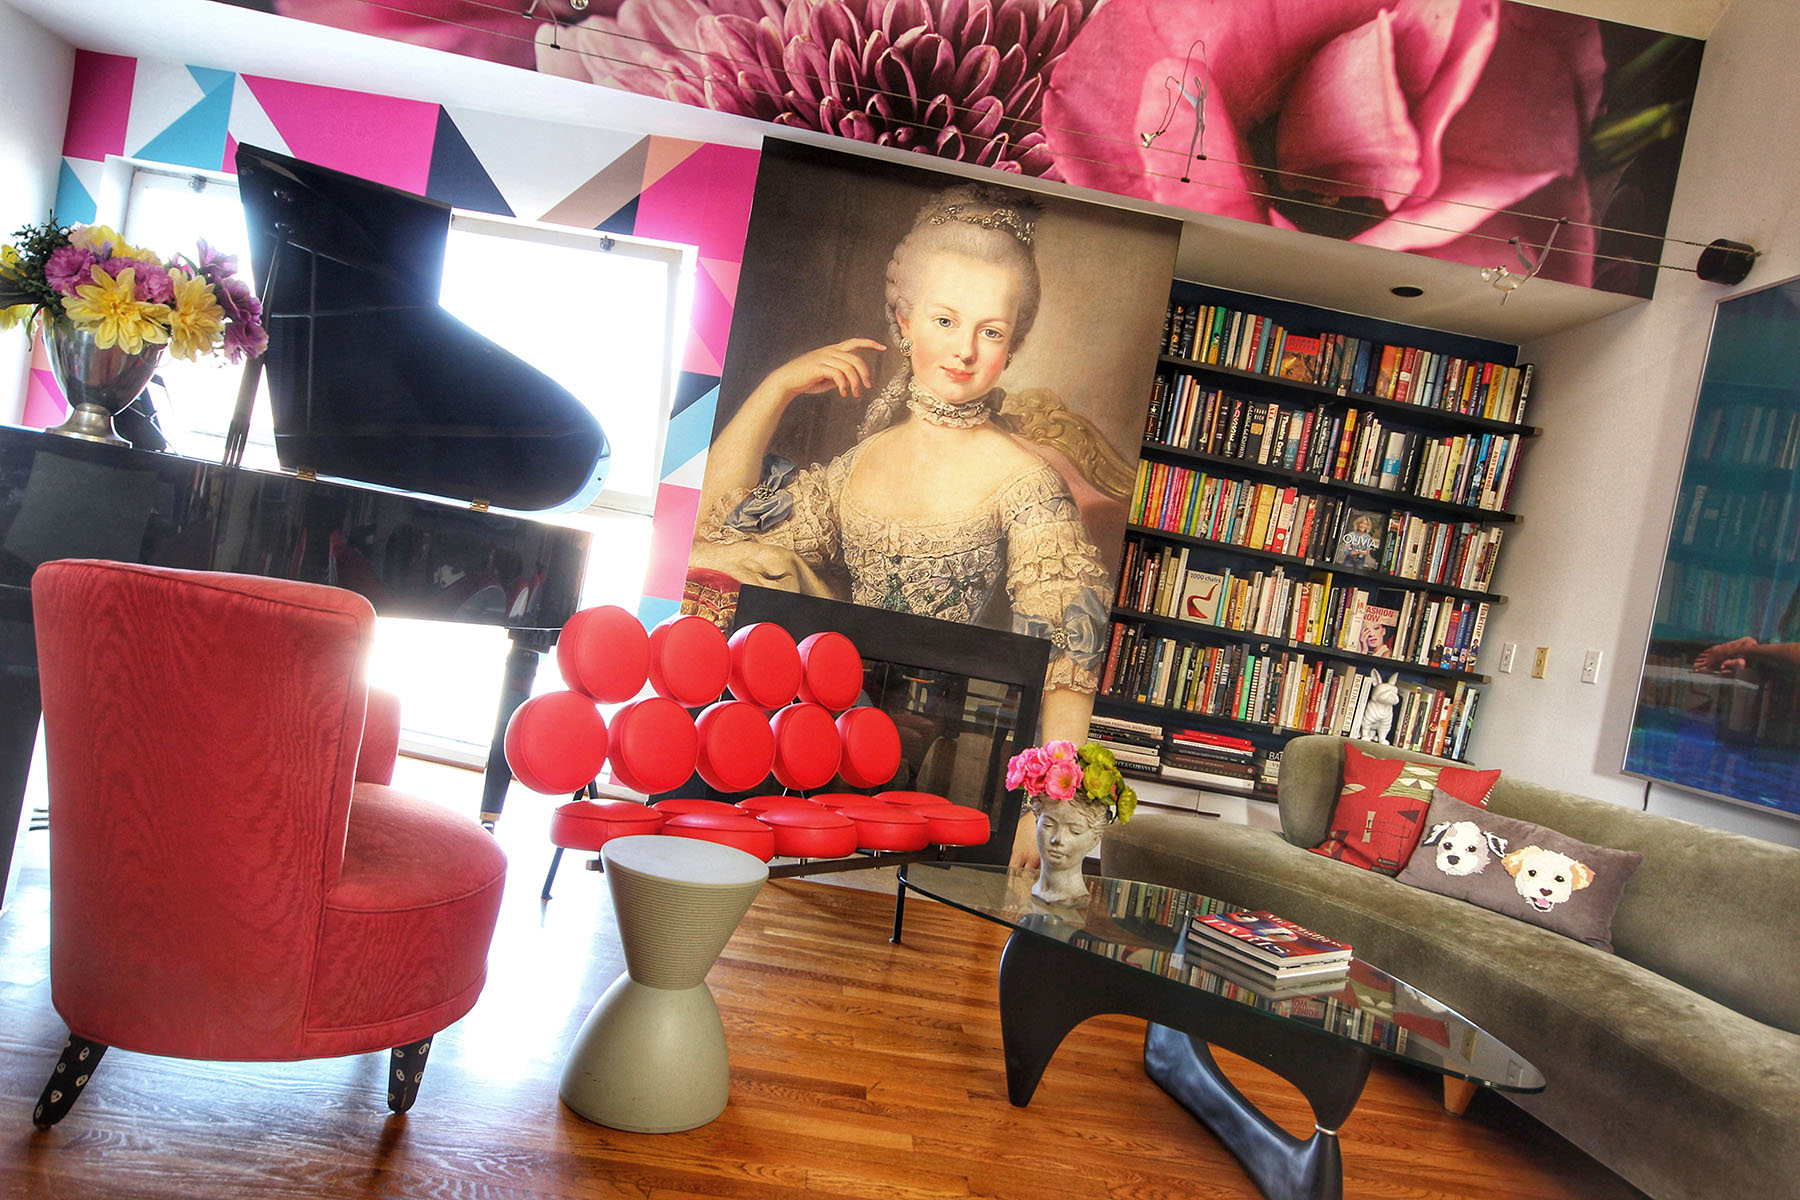
Sometimes we just need a change. My living room was fine. It was more than fine. It was featured on HGTV and got a spread in the L.A. Times. But it had been years since it had been updated. And after spending so much time at home during this pandemic, I was itching to change things up. Here is the before picture. As you can see, it’s fun and colorful. I had a word puzzle over the fireplace to add some whimsy to the room. 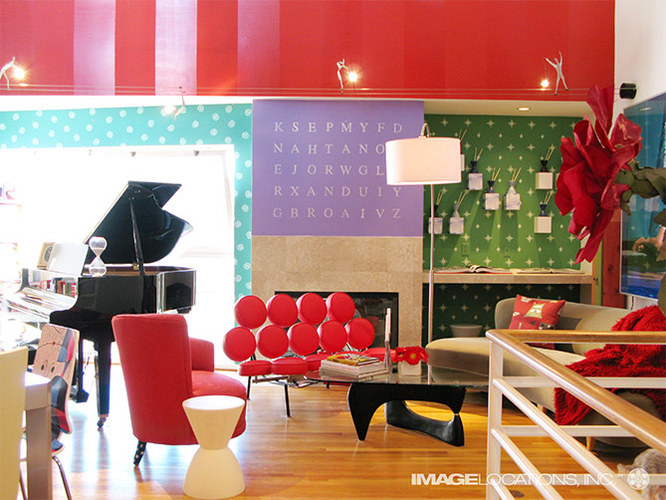
One thing I’ve wanted to change for years was the right alcove. There was a marble shelf there that came with the house. Sure, it’s nice to have a marble shelf I guess, but it was impractical. I could put some things on the shelf, but all the rest of that space was wasted. I put up some display boxes from west elm on the wall, but they were purely decorative and didn’t hold anything. What I wanted was for that alcove to be a little library for all the books that were overflowing in my house. So I got a contractor to remove the marble shelf and spackle the drywall. While he was at it, I had him remove the marble on the fireplace because I had bigger plans for it.
Once the marble shelf was removed, I bought some IKEA shelves to go in that alcove. The width of that space was 65 inches, and the IKEA Bergshult/Granhult shelves were 63 inches wide. Perfect!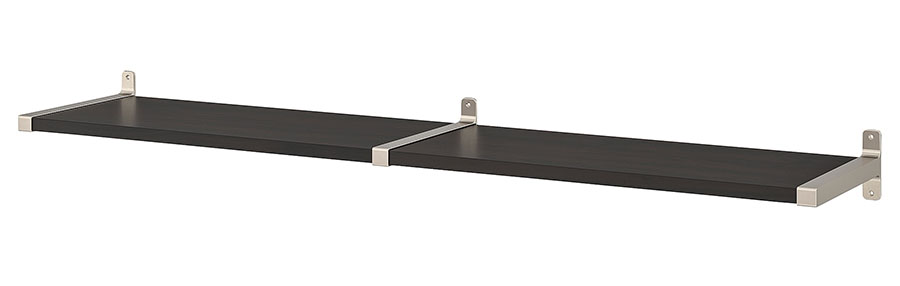
However, since the shelves would be holding heavy books, I needed very strong drywall anchors. I checked around the internet and found someone who recommended Toggler TB Drywall Anchors because they hold 143 lbs. I have to say they worked great for these shelves. I bought five shelves and spaced them 12 inches apart, and at the bottom I bought a media cabinet to act as a sixth shelf and storage space. I bought this cabinet on Target.com, and I should’ve listened to the reviews that said it was difficult to assemble. It was a bear.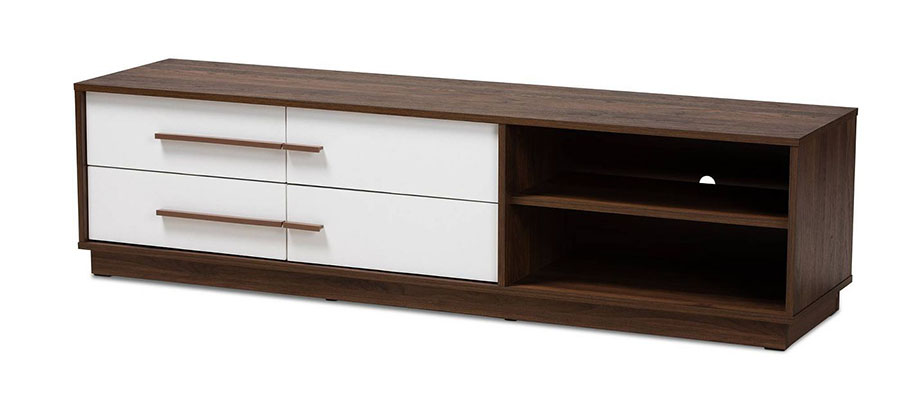
The instructions were indecipherable and many of the holes were not pre-drilled so I had to do a lot of guessing. The fact that I finally got it assembled in one piece, albeit with one drawer that did not line up with the rest, was a miracle.
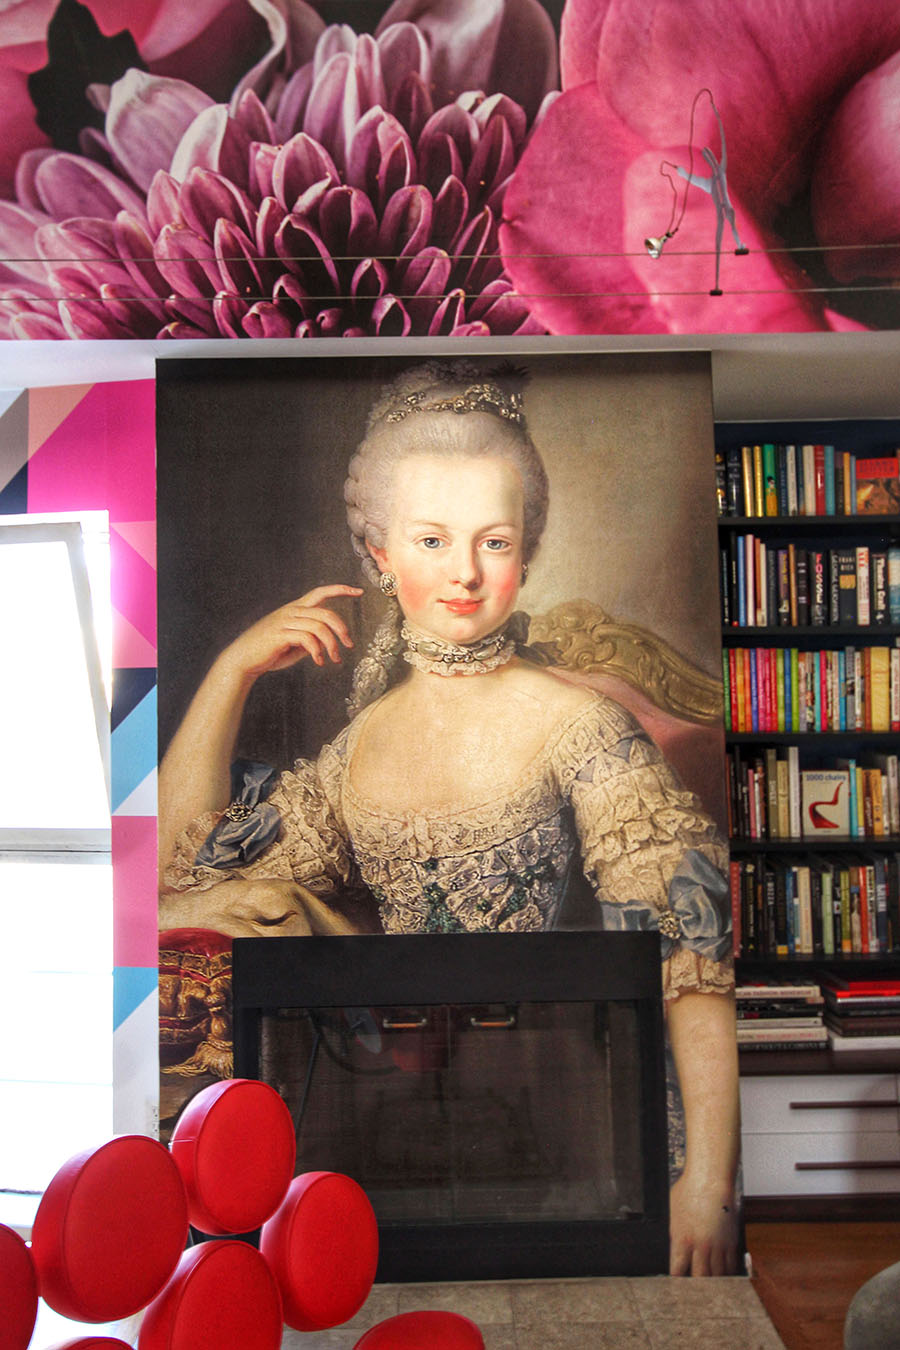
Now for the rest of the living room wall. I had been wanting to work with adhesive wallpaper murals because I’ve used them on other decorating projects. I like how easy they are to install without having to deal with paste or water. I was looking online for inspiration, and I knew I wanted my fireplace to have a big impact. My first thought was to put up a mural of Vermeer’s “Girl with a Pearl Earring,” which one of my favorite sources, muralsyourway.com, had available. But then I found a mural of Marie Antoinette on a website I had never used, limitlesswalls.com, and I knew that was it. I had visited the Marie Antoinette exhibit at the Conciergerie in Paris this past January, and I was very inspired. This was meant to be!
With Marie Antoinette designated for the fireplace, I had to then decide on wall murals for the remaining walls. I decided that the 18th-century painting of Marie, along with the bookshelves, could possibly make the room a little stuffy, so I wanted contrast in the other murals. So on muralsyourway.com, I found a modern geometric abstract pattern with pops of pink, and a macro photograph of some pink flowers to tie everything together.
To make sure it all looked good, I did a rendering on Photoshop to see how all the elements worked. Doing this step was invaluable. The rendering helped me decide what color to paint the wall behind the shelves (navy blue). And I pursued other floral photographs, but no matter what I tried, this one looked the best. The Photoshop picture also inspired me to keep going with the makeover project even when I was having doubts. Here is the rendering: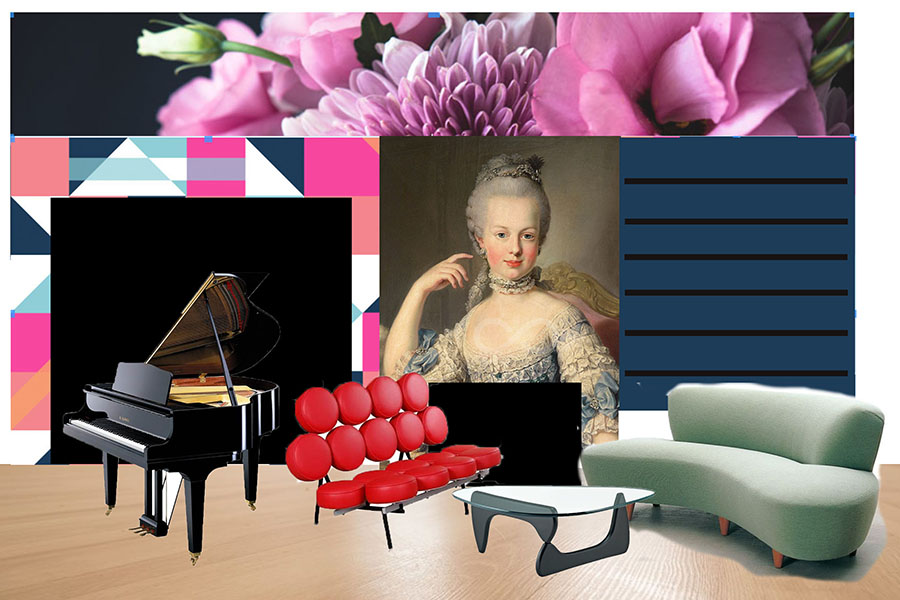
The first mural I put up was the Marie Antoinette. It came in two panels, so I got some help lining up the panels so the face was not distorted, and I think we did a pretty good job. If you’ve ever put up wallpaper that’s in panels, you know there’s a last step in which you cut a line in the middle of the overlap and peel off the overlap. I did not do this because I had just cut off the tip of my finger in a kitchen accident a few weeks earlier (that’s another story; worry not, the doctors glued it back together with surgical foam), and when I’ve done this before, I did not like the seam. So I skipped that step, and you really can’t tell there’s overlap. The only tricky part was cutting around the fireplace opening, but that just took a straight edge, razor blade and patience. 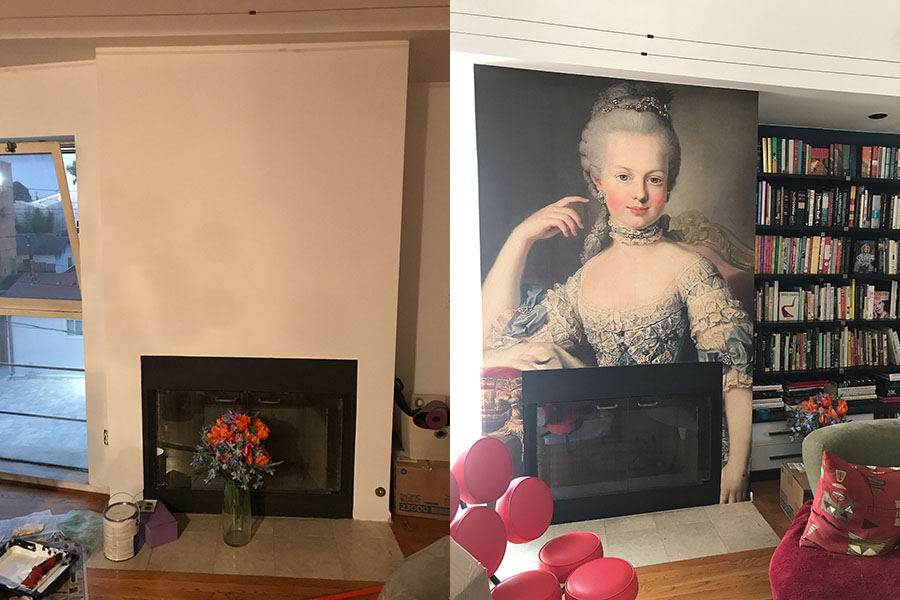
The second mural, the geometric pattern, was very easy to install. I picked it partially because the pattern could easily be divided up, which would be helpful around the window. Please excuse the mess in the picture. You know how messy you get while redecorating. 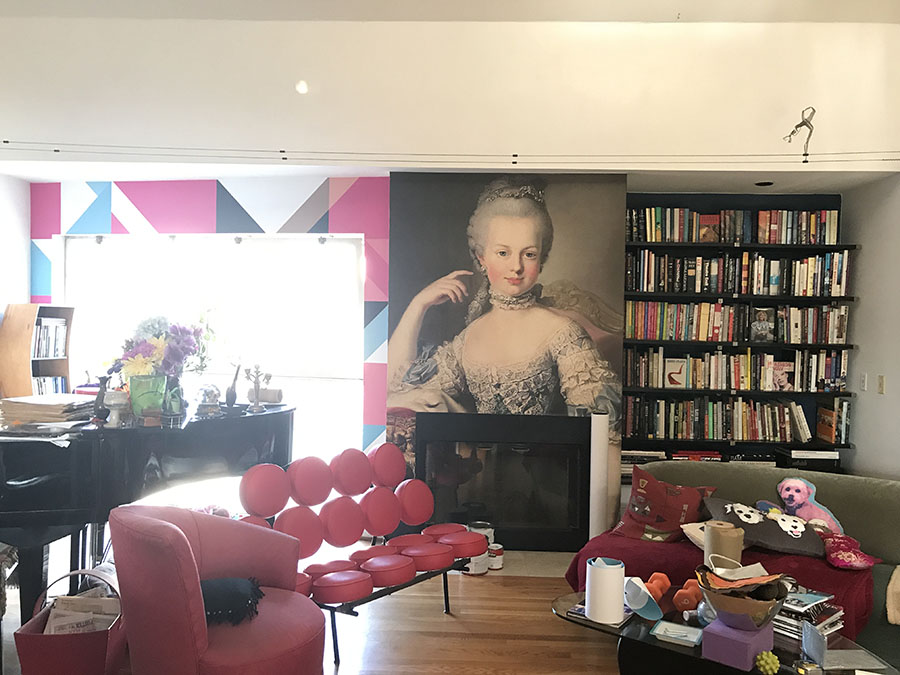
Now was the really challenging part — putting up that big floral mural on the soffit above the other walls. I was originally going to climb on my piano and put a step stool on it so I could reach that high. But the mural came in one long piece rather than separate panels as I expected, and there was no way I was going to be able to juggle a 19-foot long mural by myself. I called a few professional wallpaper installers I found on yelp, but they refused the job. They said it was too hard. What? How was I going to do this then? Well, it so happened that I was having some plumbing work done at the time (a burst pipe in the walls; another story for another time), so I asked the plumber if he would help me put up the mural. He said sure. Here he is performing a miracle. 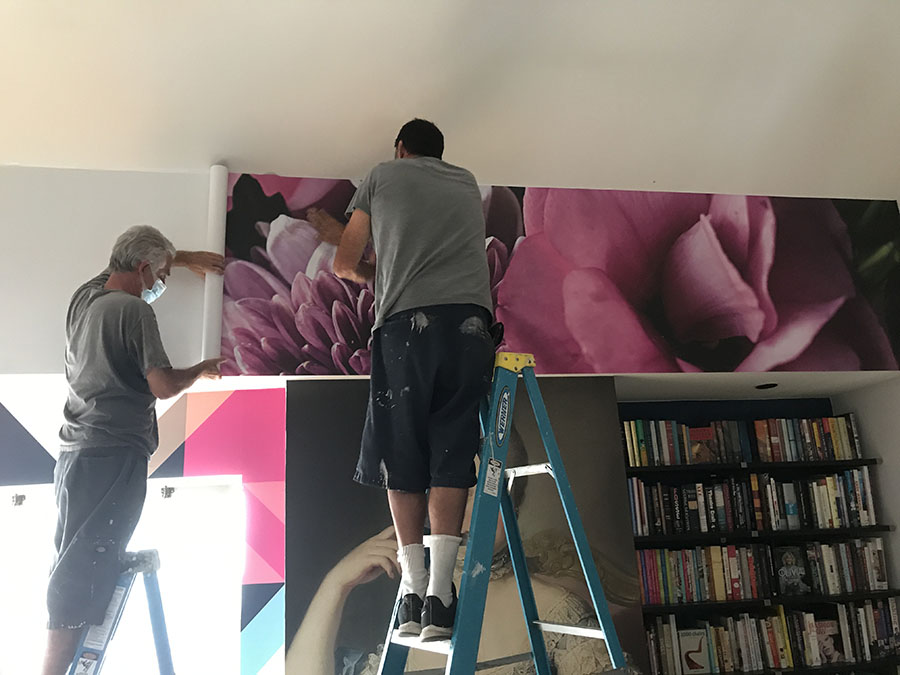
When he finished installing the mural (in less than 30 minutes, mind you), I gasped at the lusciousness of it all. It was even better than my Photoshop rendering. 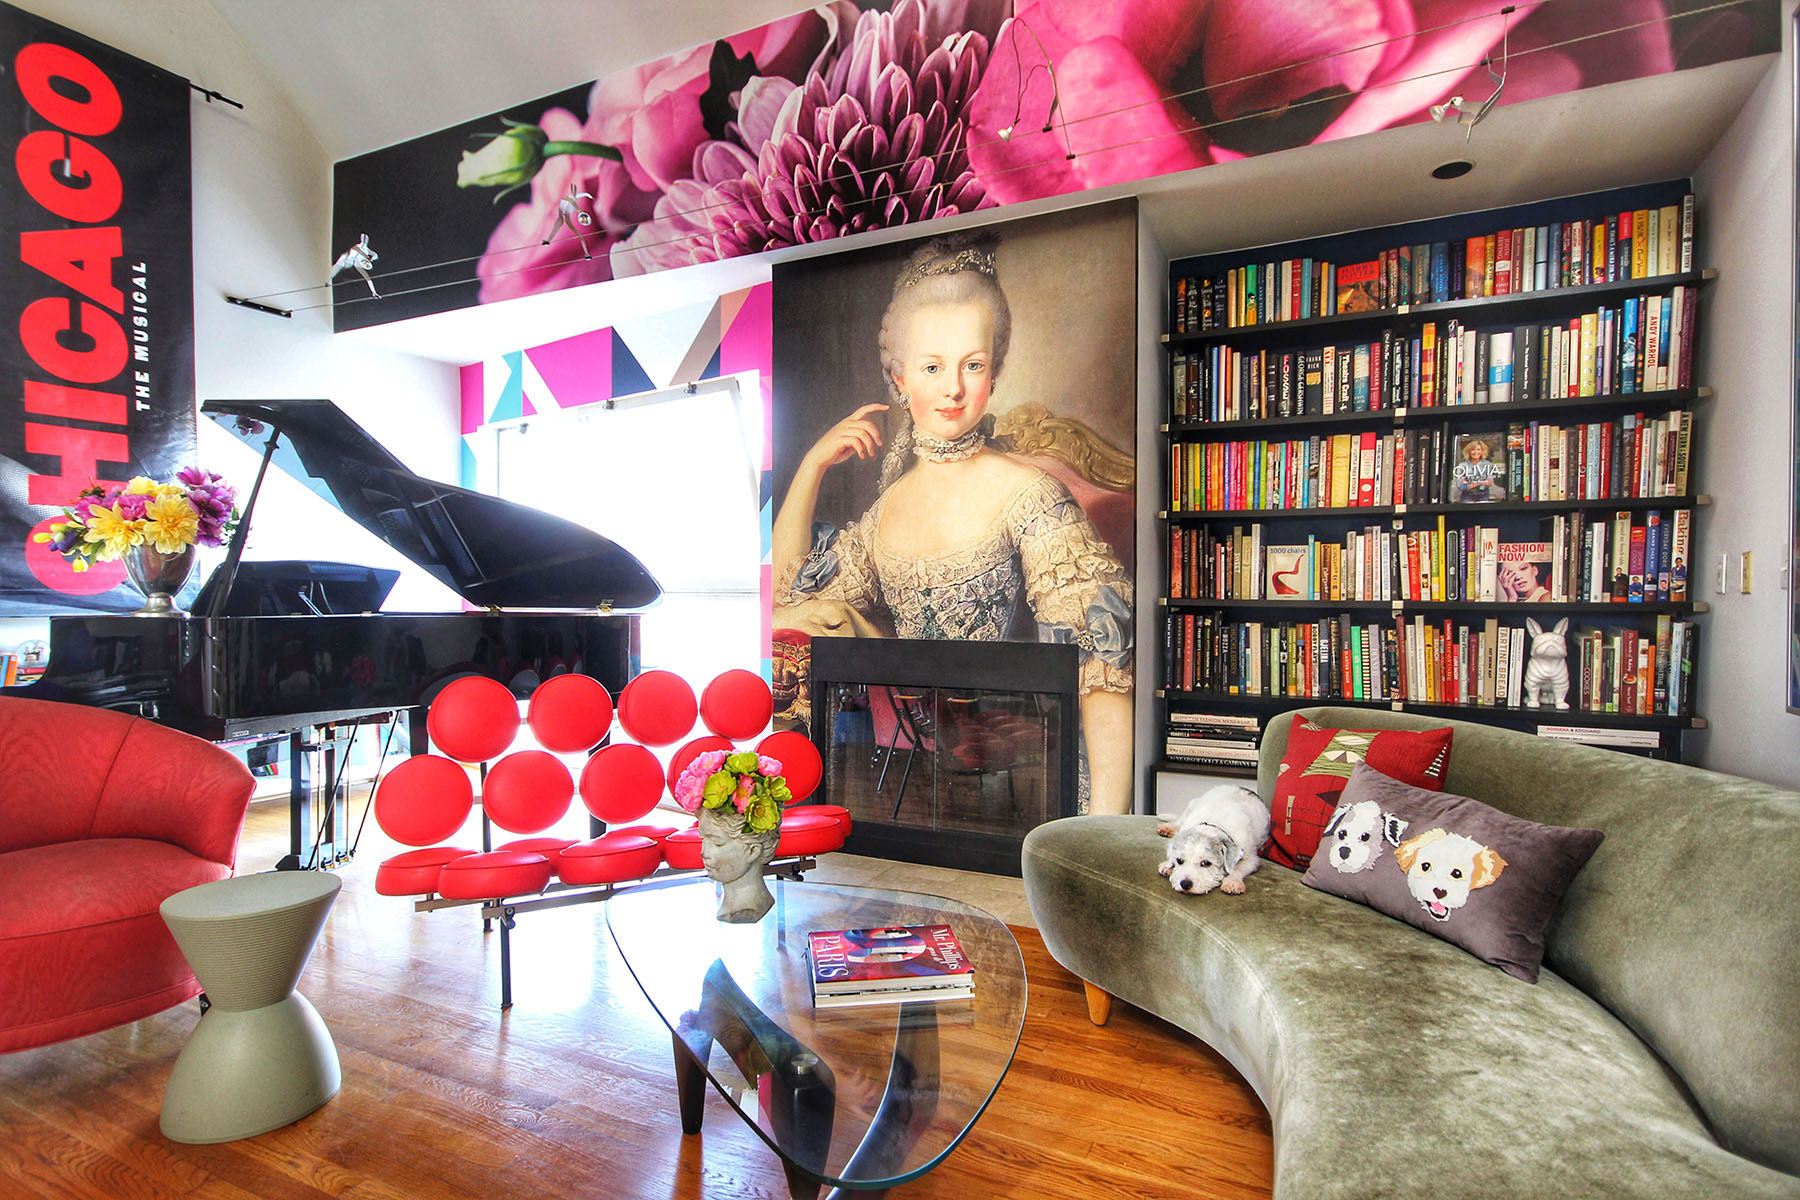
And it looks even more dramatic at night.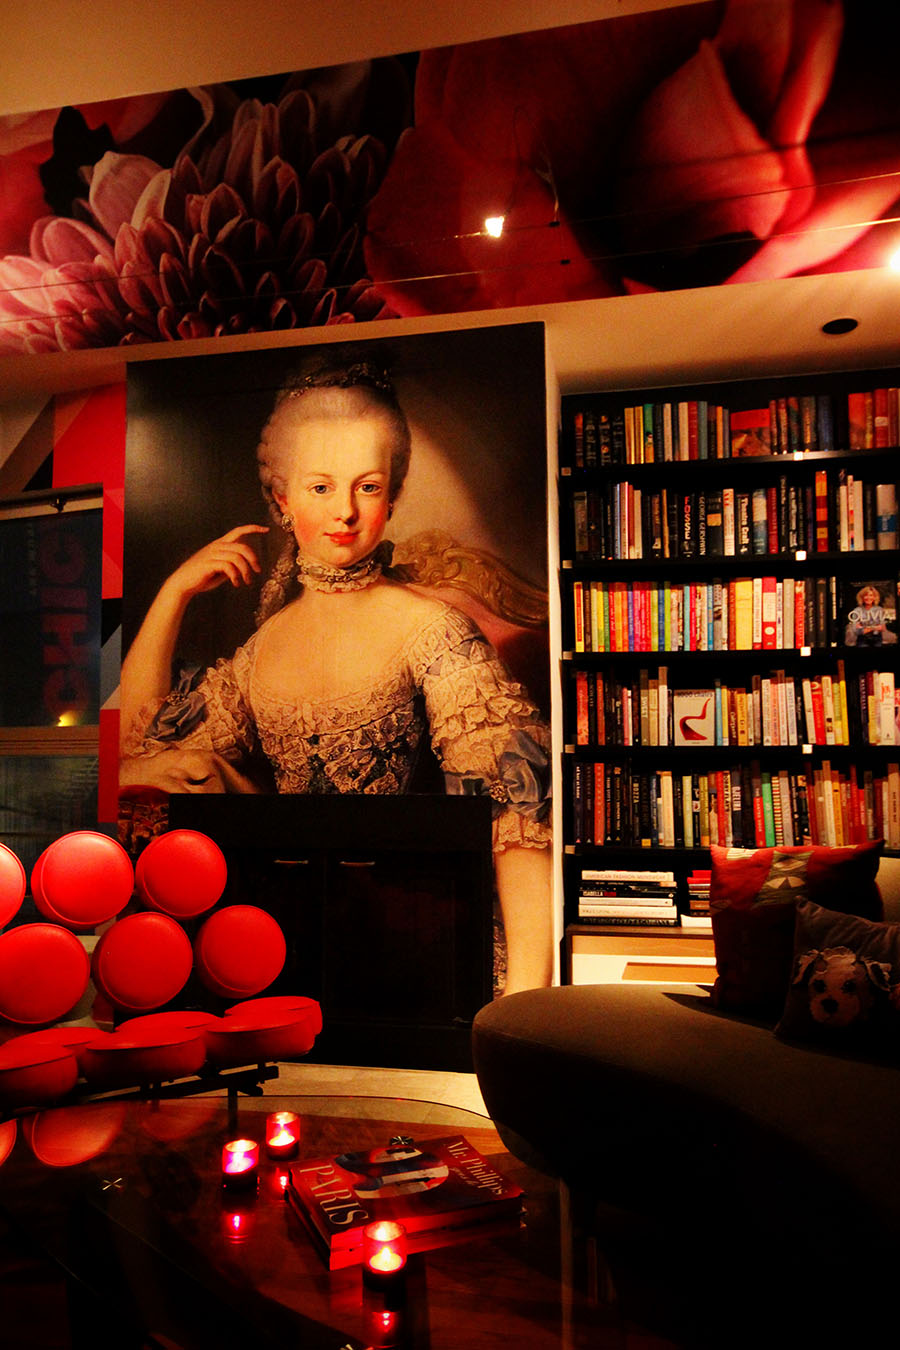
I appreciate my living room in a whole new way now, and it reminds me that change is good. It takes a little bravery, some imagination, a pinch of creativity — and a plumber who is willing to go the extra mile.
Awww…I hate to see the word puzzle go! Maybe generations from now archaeologists will rediscover it behind the wall and unravel it’s anagrammatic secrets! Keep watch, Marie!
Let’s hope the future generations discover it in their archaeological dig!