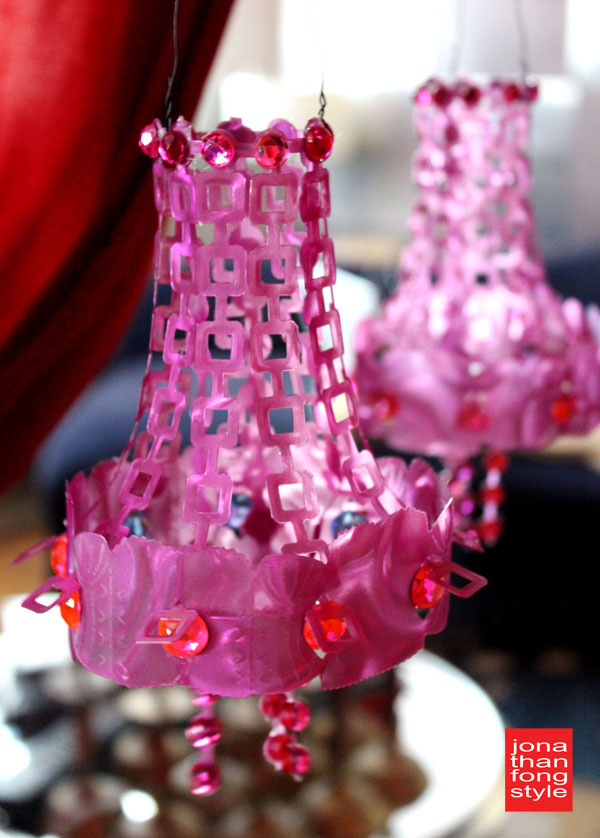
I adore designer, author and craft-lebrity Marisa Pawelko, so when I was asked to participate in the Sizzix blog hop for her new line of Modern Surrealist dies, I of course said yes. Marisa’s line is youthful, funky and fashionable. Like me her. I decided to use her “Chained” and “Bustier Mini Card” dies, and here is what I whipped up: a fabulous little chandelier. This chandelier would look awesome hanging in a school locker, or you could make several of them and hang them above a bed or a dining room table. Va-va-voom!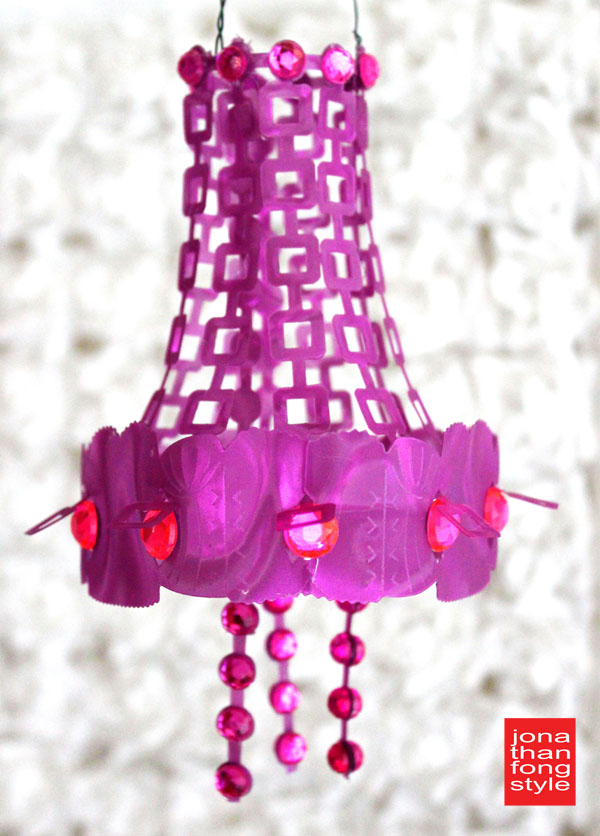
Here’s what I used to make the chandelier. Like I said, I used the “Chained” and “Bustier Mini Card” dies. They work perfectly with the Sizzix SophistiCut machine. I also used one sheet of Rowlux Illusion Film because it has a translucence that is so gorgeous. I selected the purple sea glass film. I also had some pink rhinestones on hand to add some bling.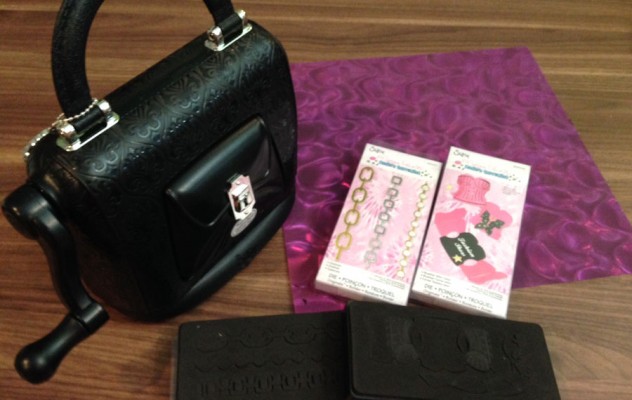
STEP 1: Cut 9 of the square chain shapes from the Chained die. The Rowlux Illusion Film works with the dies like buttah.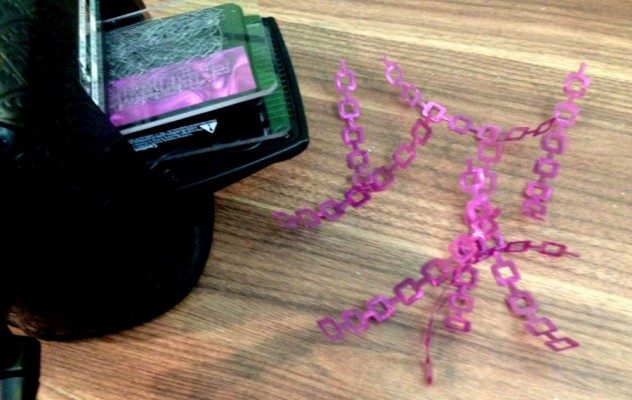
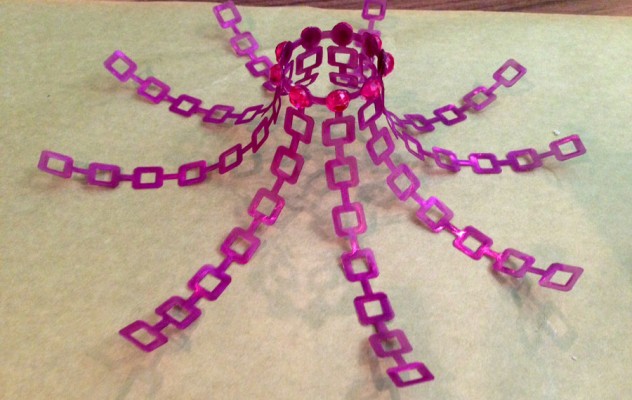
STEP 2: Cut one of the circular chain shapes from the Chained die.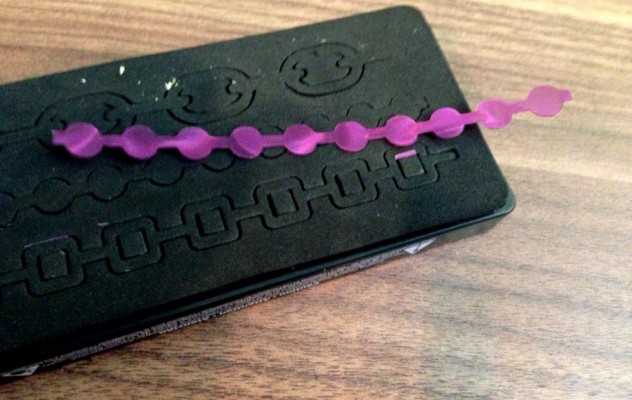
STEP 3: The square chain shapes have a “tab” at the end of each one. Hot glue that tab perpendicular to one of the circles. Then hot glue a small rhinestone on top of that tab to secure the whole thing. There are 10 circles on this chain, but only attach the square chains to 9 of them, as in the picture. 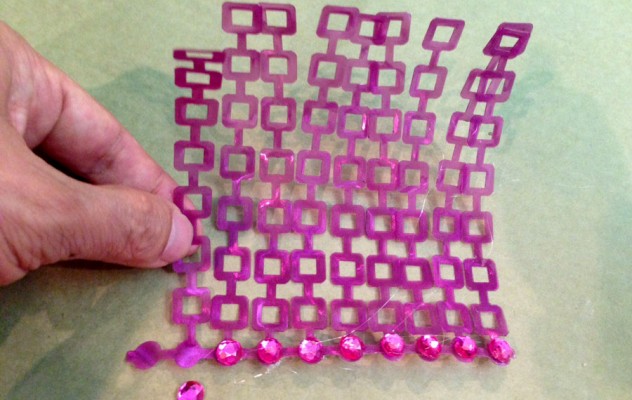 STEP 4: Roll the circle chain into a loop, hot gluing the unattached circle to the first circle/rhinestone on the loop. Now the square chains will fan out.
STEP 5: Die cut three of the bustier card shapes.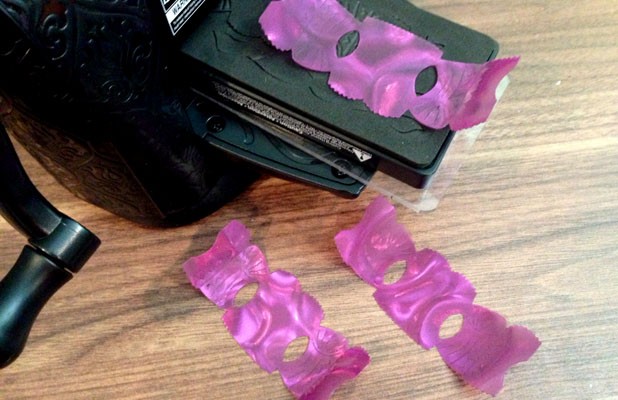
STEP 6: The three bustier card shapes glued together in a loop will result in 9 holes that separate the individual bustiers. These 9 holes will be matched up with the 9 square chains. To attach them, slide the last square of the square chain through the hole. Secure it in place by sandwiching a large rhinestone on either side of the hole with a hot glue gun. This way, the square chain is locked in there. Below is how it looks. That is the back of a rhinestone you see through the hole. Another rhinestone is hot glued on top of that, and the square chain is locked in place. This photo also shows the edges of two bustier card shapes glued together. The rhinestone acts like a connector.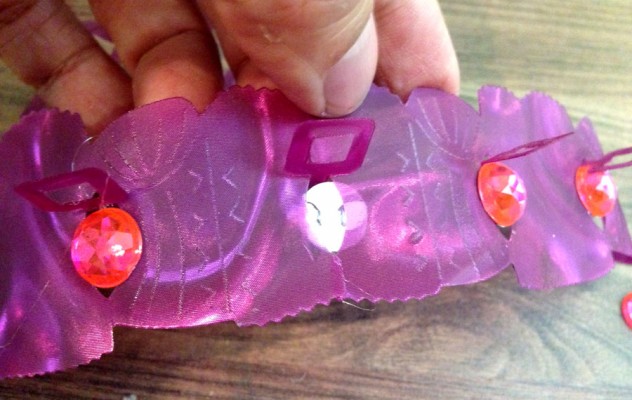
Here’s how it looks in the back. Notice I used a different color rhinestone on the inside. Mainly because it was hard fishing for so many pink ones in my stash.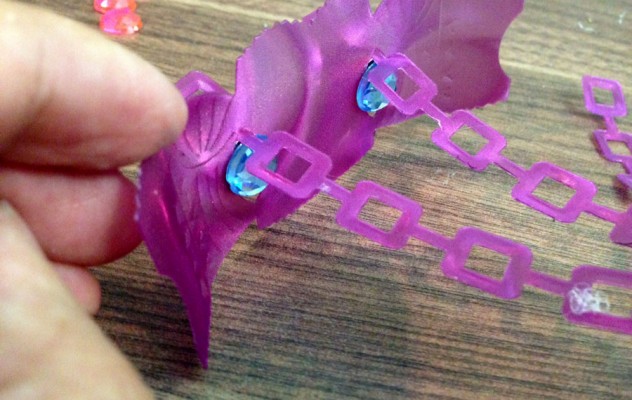
STEP 7: Now cut 6 more of the circle chains. Hot glue 2 chains together so you have 3 long circle chains. Hot glue these to the inside of the loop at the very top of the chandelier (from Step 4). I evenly spaced them out. These 3 chains will dangle from this loop all the way down through the bottom of the chandelier. They will be longer than you need them, so cut off as many circles as you wish. You can even make them different lengths for fun.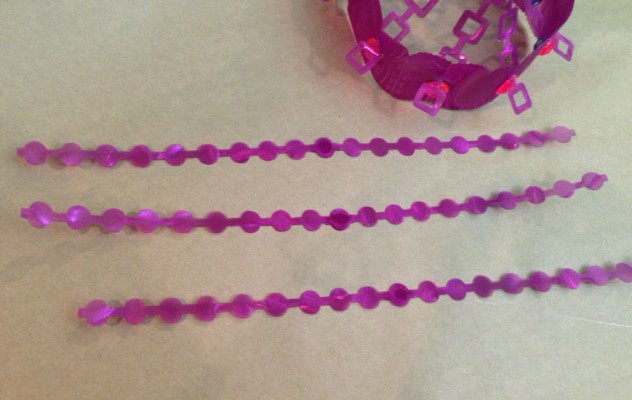
STEP 8: On the circles that are exposed at the bottom of the chandelier, hot glue small rhinestones on both sides. Loop some wire at the very top of the chandelier for hanging, and you’re done, you chic and crafty diva (or divo).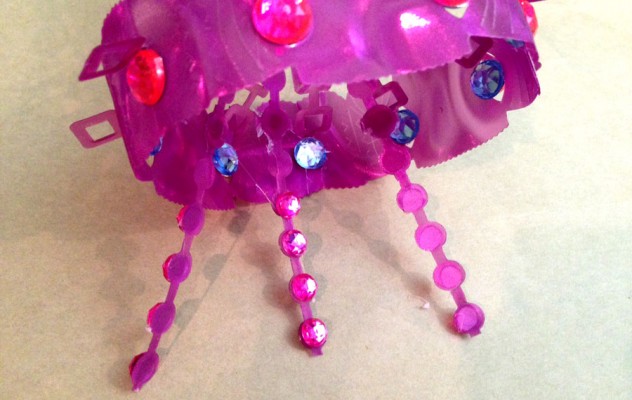
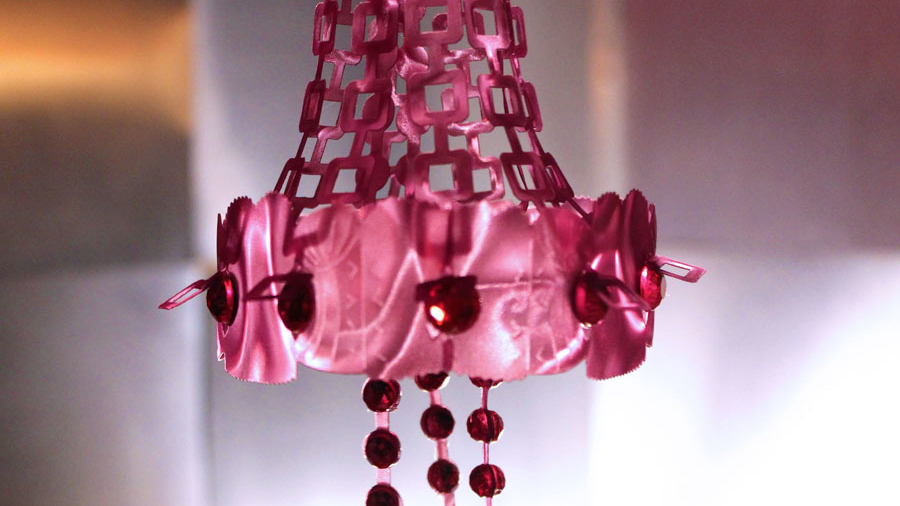
I love how this chandelier looks in different light. Here it is at night. Notice how the Rowlux Illusion Film glistens. The bustier part of the chandelier looks like flowers, doesn’t it?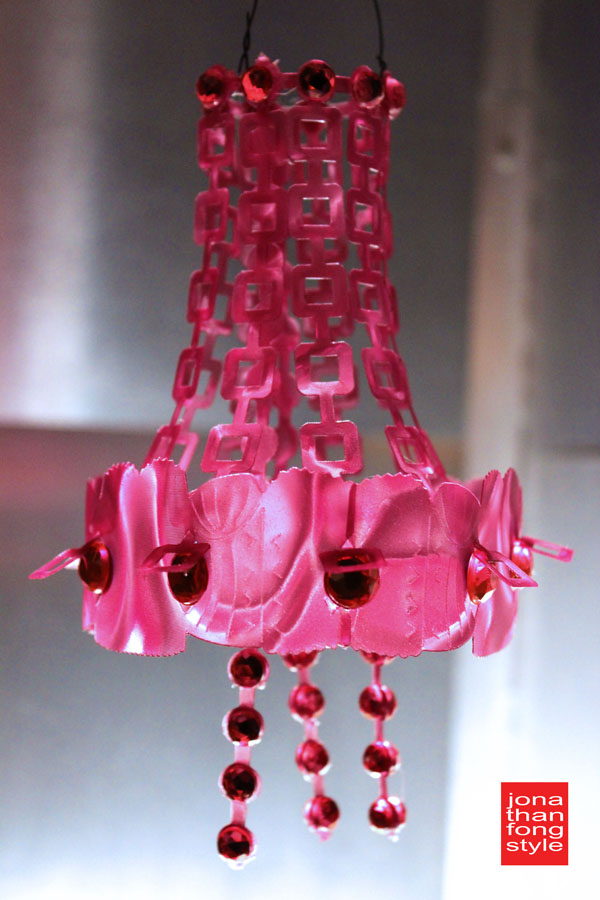
Hop with us today to check out who has been making what with Marisa Pawelko’s line of unique and snazzy Sizzix dies from The Modern Surrealist collection! Her designs will put a little sparkle and extra pizzazz into your day. With the versatile Sizzix Originals dies and the Sizzix SophistiCut Machine you can make fun and easy jewelry, add some perk to your fashion, brighten up your space with a little lively décor- and whatever other exuberant crafts you can imagine up!
Hang out with these designers, see what awesomeness they’ve made, leave them some love and join us back here to share what goodness there was to be had:
- Margot Potter @margotpotter
- Jonathan Fong @jonathanfongstyle
- Hilary Kanwischer @hilaryscraps
- Anna-Karin Evaldsson @layersofink
- Tami Mayberry @tamimayberry
- Karin Jordan @leighlaurelstudios
- Laura Russell @makelifelovely
- Jennifer Priest @hydrangeahippo
- Tiffany Johnson @iheartart
- Tanner Bell @alittlecraftinyourday
- Courtney Chambers @alittlecraftinyourday
- Kathy Cano-Murillo @craftychica
- Jade Harrington @jaderbomb
For this Sizzix Blog Hop featuring the Marisa Pawelko line of Sizzix products, The Modern Surrealist, Sizzix will ALSO be giving away this scandalous prize of over $150 retail value! It includes these phenomenal items: Sizzix SophistiCut Machine, Trucker Cap Mini Card, Big City, Fashion Cuff, Cheetah Overlay, Lush Lips, Sunglasses
Enter your email address below for a chance to win these fabulous Sizzix products!
a Rafflecopter giveaway
Disclosure: The dies and die cutting machine were provided to me at no cost to create this post, but the views herein are my own. Also, none of the links in this post are affiliate links, so simmer down.


What a truly clever project I just love it! I esp love the color its my fav!!! thnx for a chance to win!! what a wonderful new machine!!
That is a cool project, very very fun. So many great ideas on this hop!
WOW! Thinking out of the box. Cool!!!
Thanks for stopping by, Therese!
What a beautiful chandelier! I love the colors and bling.
Thanks Robin! You can’t have too much bling, right?
How adorable is that?
Thanks Shannon!
Like, this is totally bitchin’! Would love to get my hands on some of the Rowlux film but can’t seem to find it anywhere! This chandelier is amazing! Definitely going to give this a try! TFS!
Thanks Barbara. They sell the Rowlux film on Amazon.
Very cool project!!
Thanks Judy!
Thanks so much for being a part of this blog hop Jonathan! From the moment I met you I knew that I’d found my male style counterpart! I so dig this fabulous bustier chandelier! The innovative die use is so inspiring and of course I totally love the color, Rowlux material and BLING! I am beyond honored to be featured on your super groovy deluxe blog!!!!
I’m so thrilled to be a part of this and see your success! xoxo
Wowzers!!! LOVE, LOVE, LOVE this!!! So fun and such a super cute project! <3
Thanks Tonya! Glad you like it.
awesomeness Jonathan, love it! Hope this posts!
AWESOMENESS Jonathan!!!! Love it!
Johnathan!!! AWESOMENESS and LOVE IT!
You’re awesome sauce too. Love that profile pic.
Another fabulously fun DIY from Jonathan Fong!
You’re fab, Margot!
Such a fun and super clever idea!! Love your little chandelier. Those two dies were perfect to create this. That film you used looks really cool too.
Thanks Anna-Karin! That’s Rowlux film, which Marisa is also the spokesperson for. You should get some. It’s fantastic.
What a fun project..thanks for sharing
Thank YOU, Shannon!
WOW this is totally amazing!!!!!!!!!!!!!!!! Love love love it!!! You are the king of invention 🙂
Thanks Jennifer! You are the queen of swag!