They’re alive! Alive! The monsters, that is.
I’ve always wanted to make monster building blocks – where I could mix and match body parts on wood blocks – and was never sure how. Now that I’ve discovered Wood Attitude printable film, I am the mad scientist I always wanted to be. Bwahahahaha!
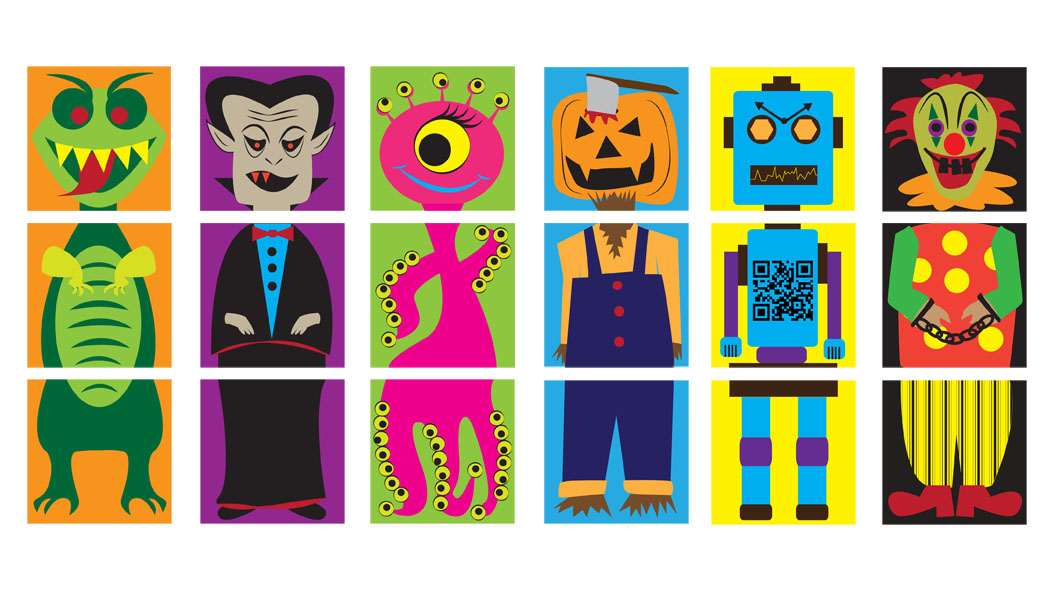
Here’s what I did. First, I drew 6 monsters and divided up their heads, bodies and legs. I drew 6 because each cube has six sides. (I know! I actually drew these. My Adobe Illustrator teacher would be so proud.) I also sized them to 2-inch square sections because my wood blocks were 2-inch cubes. (I bought the wood cubes at woodcrafter.com.) You can download these graphics for free with the links below:
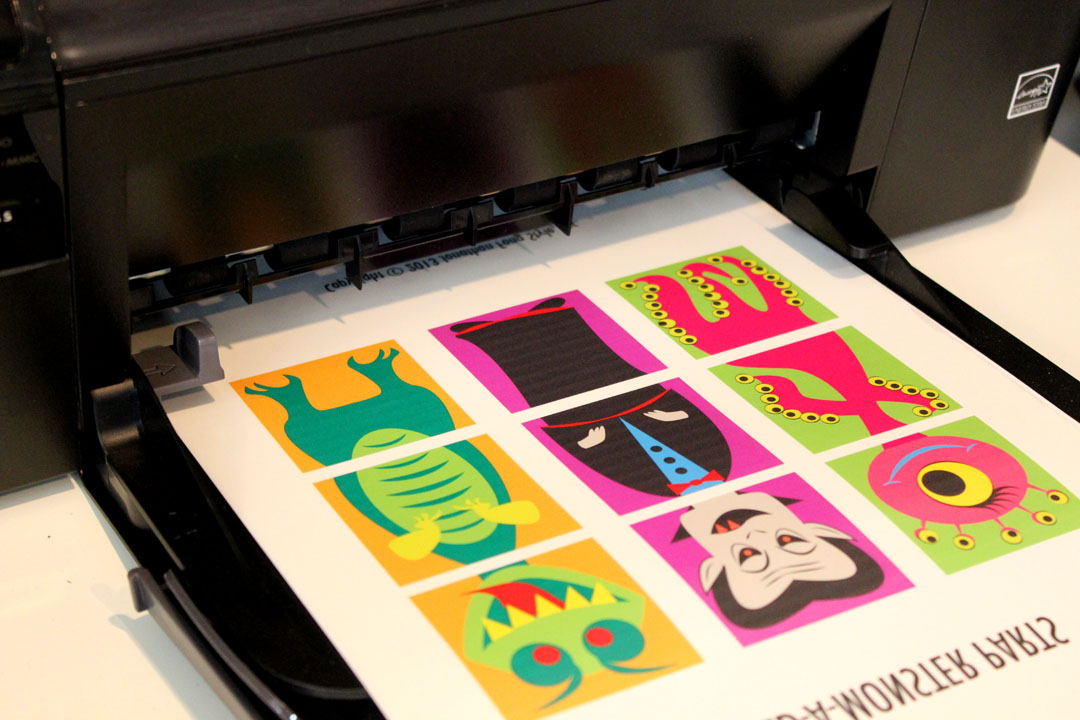
 Then I printed them out onto two sheets of Wood Attitude printable film – three monsters per sheet. Wood Attitude is one of the Craft Attitude films, which let you apply any image or photograph onto practically any surface. And it goes on wood like buttah. (If you have one of the other Craft Attitude films like Shoe Attitude, Jewelry Attitude, etc., they work identically to the Wood Attitude, and you can use them for this project, no problemo.)
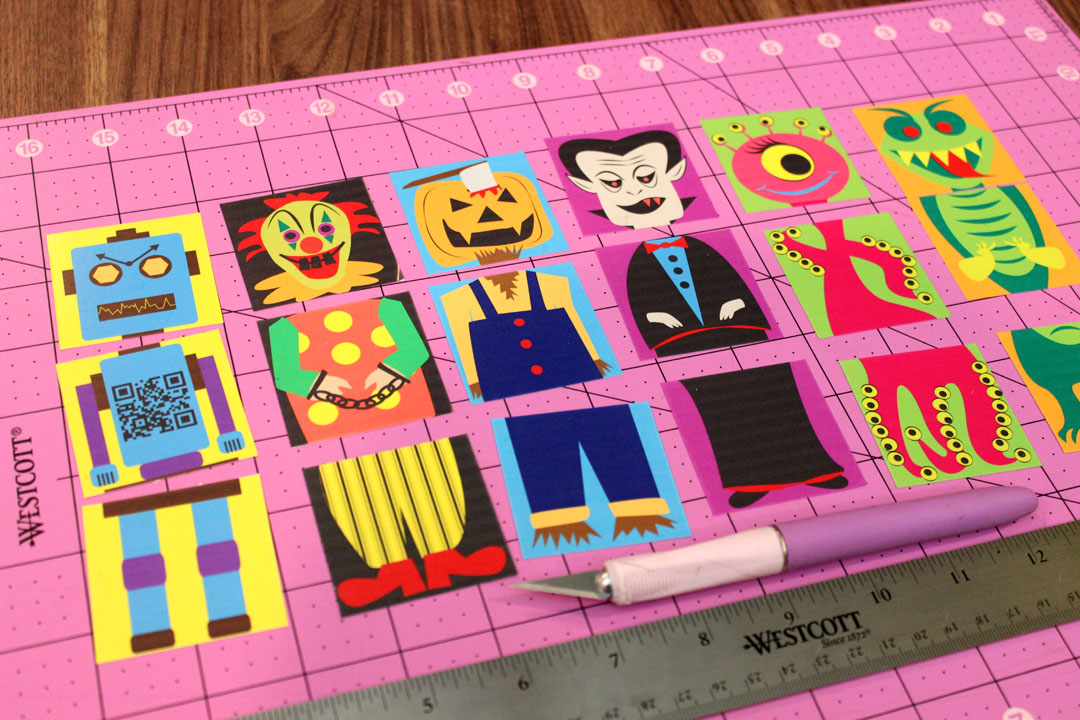
Next, I cut all the individual squares of the Wood Attitude film while the protective backing was still on. For me, cutting is the most tedious part of doing crafts. I need an intern who can just cut for me. Also, the wood cubes are usually not exactly 2 inches – they have variances. So I would recommend placing the cut pieces on the wood sides to see how they fit and make adjustments accordingly. (Boy, I used a lot of adverbs in the last two sentences.) I think it’s better for the Wood Attitude to be a little bit smaller than a little bit bigger than the wood.
After all that cutting, I sprayed some Scotch Super 77 adhesive to the ink side of the Wood Attitude squares, pressed them sticky side down onto the wood blocks, and peeled off the protective backing. If you don’t have spray adhesive, you can use a glue stick, although I would apply the glue stick to the wood and then press the Wood Attitude film to that. Be sure to put all the heads on one cube, the bodies on the second, and the legs on the third.
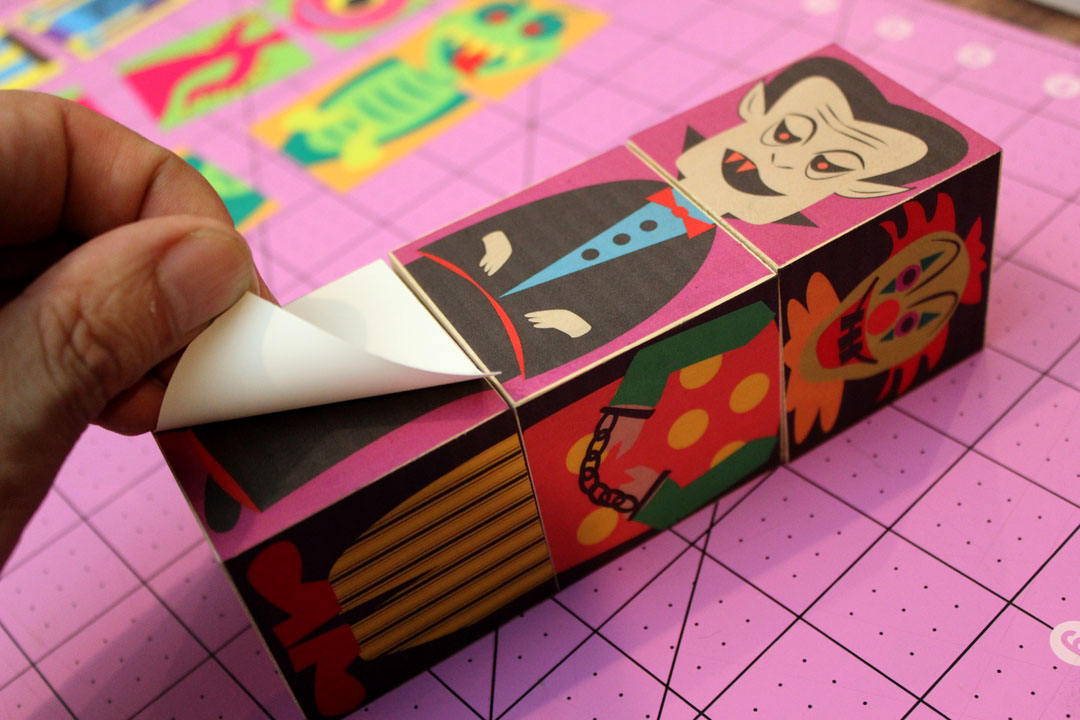
And it was as easy as that! I love how it looks like the monster graphics were printed right on the wood. And now that I’ve found a source for cheap wood cubes, I may make all kinds of decorated wood blocks. I’m thinking baby gifts! Craft Attitude, you’ve created a monster! Me!
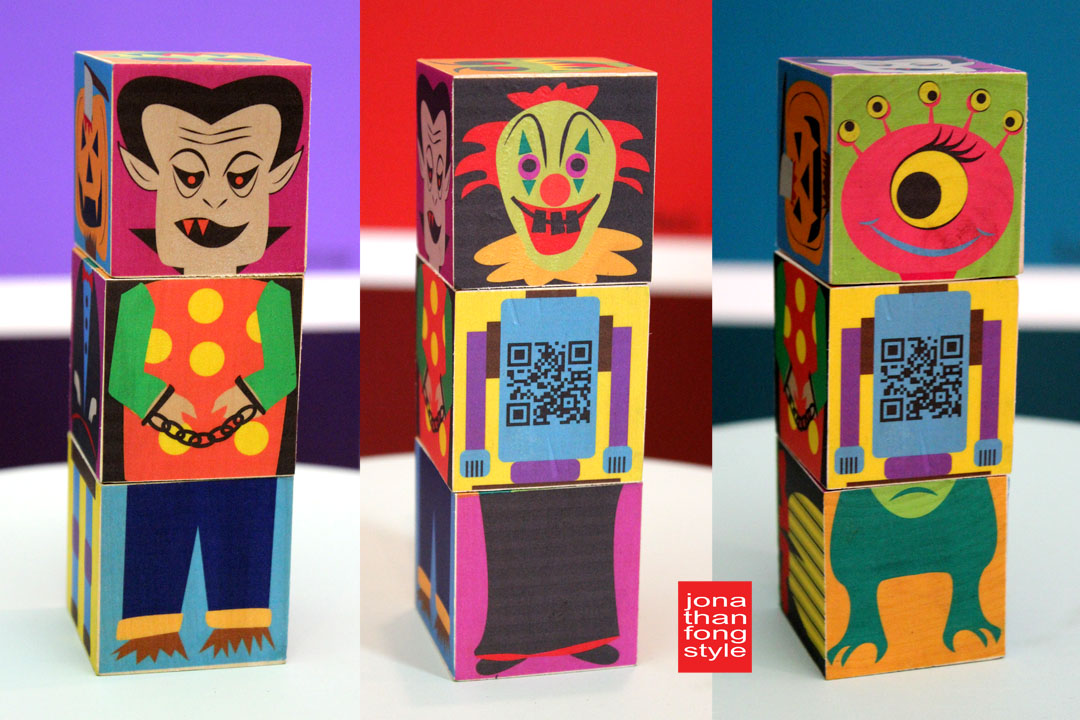
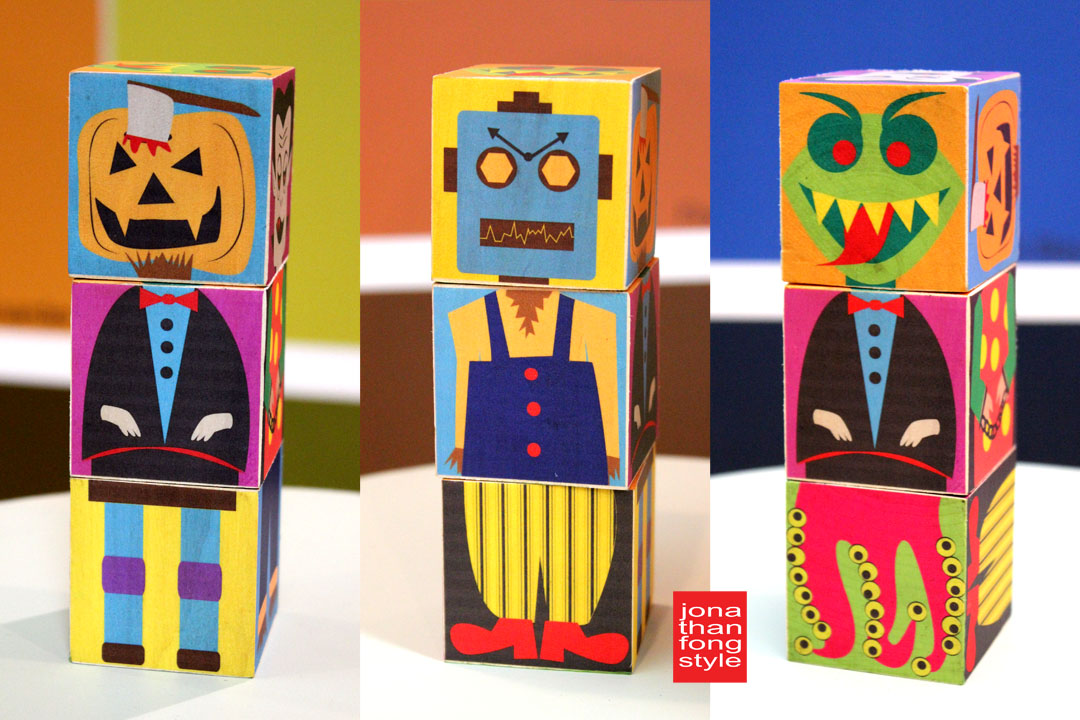
But for now, I’ll play with these Halloween-inspired Build-a-Monster blocks. And you can call me Dr. Fongenstein!
![]()
Note: I am a designer/spokesperson for Craft Attitude, and the links on this post and elsewhere on this site are affiliate links. But you can tell I love this product, and my enthusiasm for it is genuine.
Dr. Fongenstein I bow to your creative genius!
You are too funny!
Great project. Wish I had discovered this when my grandchildren were small enough to play with the blocks. Will be great Baby Shower Gifts.
Thanks Debbie. I even made a set for a friend’s birthday this week. Grownups love playing with them too.
oh, just love this project!!! need to get my hands on some of this product and get crafty!!! can’t wait to see what the other designers make.
Thanks Maria! There are some talented designers on this blog hop.
OMG i love love love these blocks!!! And your graphics rock, as usual 🙂 So can see me and Matt doing this together!
Thanks, Jennifer. I have so much fun playing with them, too!
These are SO fabulous. Thanks for providing the free printable, too, that is so cool!
Thanks Heather. I had so much fun making them!